 Skip to content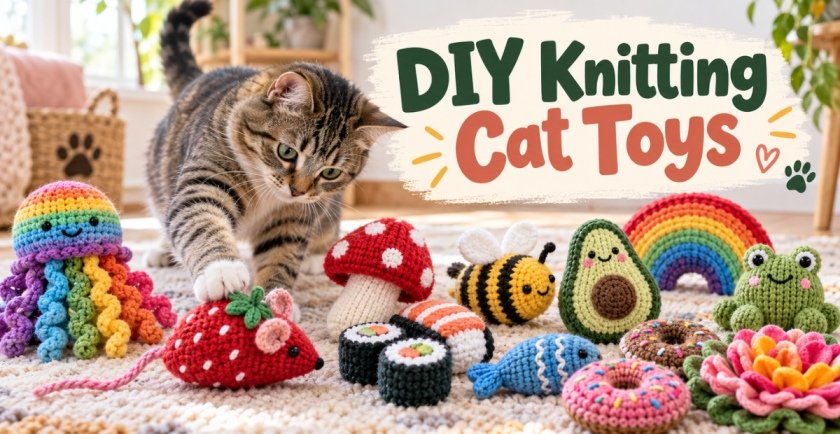
Handmade cat toys can be practical, inexpensive, and surprisingly beautiful. If you enjoy small knitting projects, these DIY knitting cat toys are a fun way to use leftover yarn while giving your cat new shapes to bat, chase, carry, wrestle, and investigate. Instead of filling the list with twenty versions of the same mouse or ball, the ideas below move through food-inspired toys, soft animals, seasonal kickers, pastel characters, and a simple enrichment project.
The small scale of most of these projects also makes them approachable when you want a satisfying make without committing to a sweater-sized project. A donut may use only a little yarn. A cloud can be made from two simple panels. A carrot or sardine gives you a chance to practice shaping on a larger piece. And if you have a basket of half-used yarn balls, the caterpillar, daisy set, jellyfish, and rainbow are excellent ways to turn those scraps into something useful.
One rule matters more than perfect stitches: cat toys need to hold up to claws, teeth, kicking, and repeated batting. Knit at a firm gauge, hide yarn ends well, and choose embroidered features instead of buttons, beads, bells, sequins, or plastic eyes whenever possible. Any toy with a damaged seam, exposed stuffing, or loose yarn should be removed from play.
Before You Start Knitting Cat Toys
You do not need a huge craft kit for these projects. Most can be made with washable yarn, suitable knitting needles, a tapestry needle, stuffing, scissors, and a few scraps of embroidery yarn. Optional catnip can be added to some toys, but it is not necessary for every cat and it should always be enclosed securely inside the stuffing.
- Use a firm gauge: Tight stitches make it harder for claws to pull stuffing through the fabric.
- Choose washable yarn: Cat toys collect fur, dust, and saliva, so easy-care yarn is practical.
- Embroider faces: Soft stitched eyes and details are preferable to detachable decorations.
- Keep strings short: Avoid long loose cords, yarn tails, ribbons, or trailing strands.
- Check every seam: Tug gently on fins, leaves, wings, petals, ears, and tails before play.
- Supervise unusual designs: Snuffle-style toys and anything with multiple folds should be used while you are nearby.
1. Strawberry Mouse Knitted Cat Toy
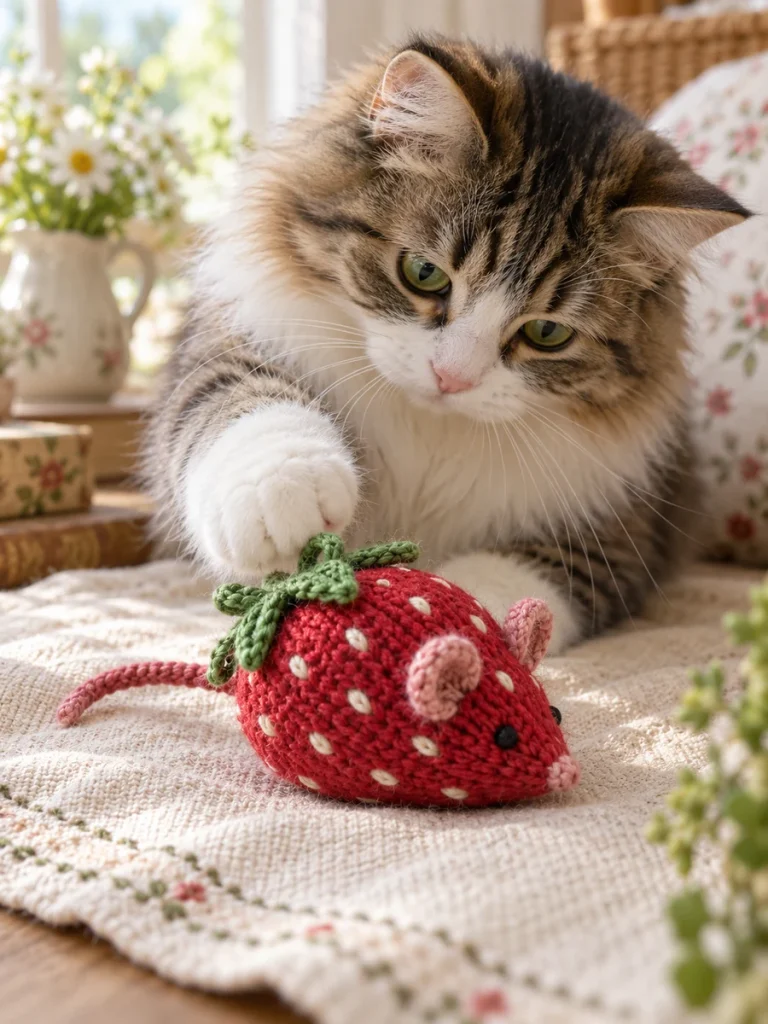
A sweet strawberry-meets-mouse design that gives a classic cat toy a much more photogenic cottagecore look. The tapered body is easy for a cat to pick up, bat across the floor, and carry from room to room.
Things You Will Need
- Red yarn
- Green yarn
- A little pale pink yarn
- Cream embroidery yarn
- Stuffing
- Knitting needles
- Tapestry needle
- Optional catnip
How to Make It
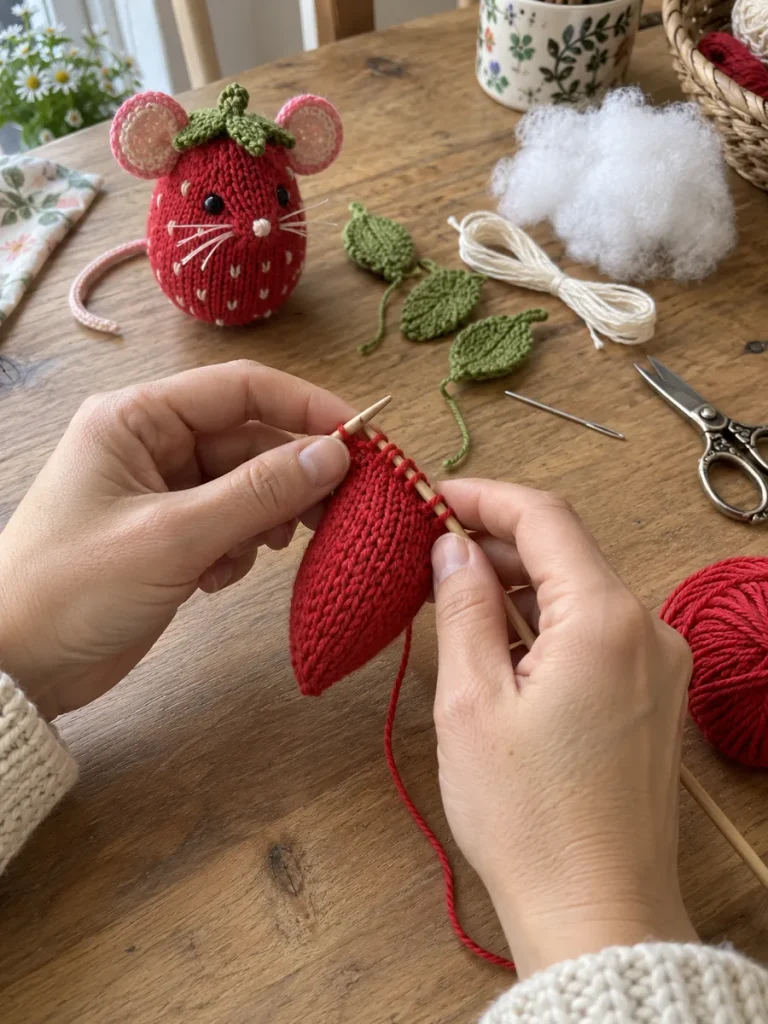
- Knit a firm red oval that narrows toward one end for the nose.
- Stuff it lightly but evenly, close the seam, then add small knitted ears and a short, securely stitched tail.
- Embroider the eyes and strawberry seeds so there are no hard pieces to come loose.
- Finish with a small green leaf crown sewn flat and firmly to the top.
Play and safety tip: After finishing, roll or toss the toy gently yourself and inspect the seams again. Small handmade toys get a surprising amount of wear when a cat becomes attached to them.
2. Rainbow Jellyfish Chase Toy
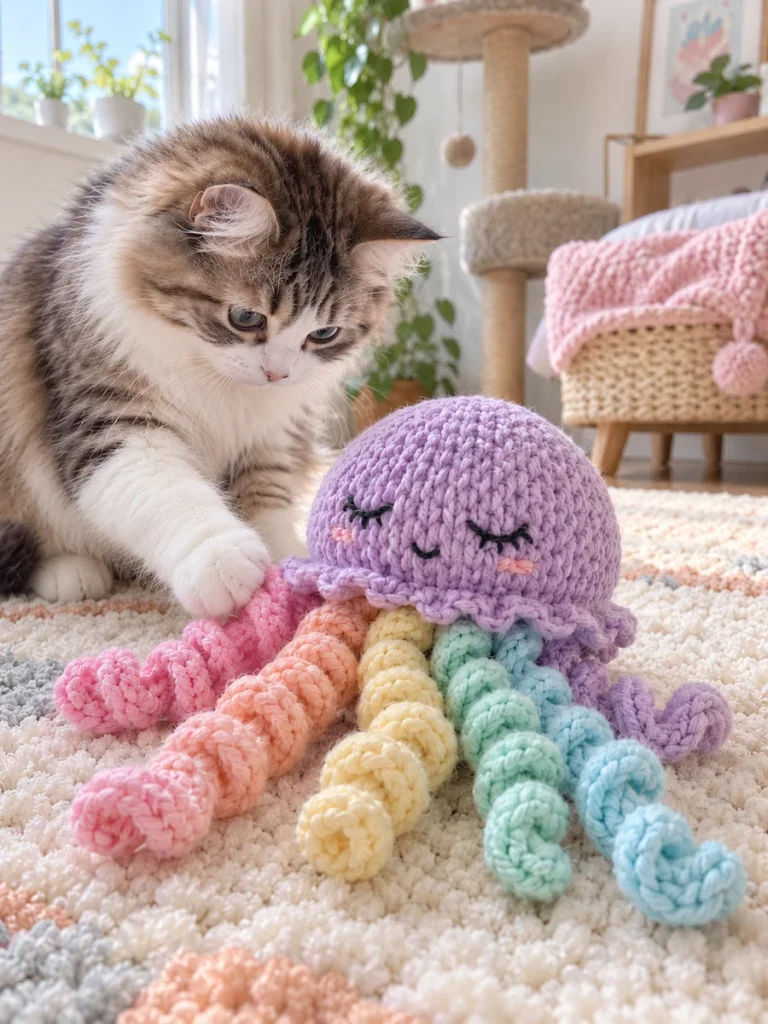
This pastel jellyfish adds movement without relying on long loose strings. Short spiral tentacles bounce and curl when the toy is nudged, which can make it especially interesting for cats that like to chase small moving objects.
Things You Will Need
- Lavender yarn
- Small amounts of pink
- Peach
- Yellow
- Mint
- Aqua and lilac yarn
- Stuffing
- Knitting needles
- Tapestry needle
- Dark embroidery yarn
How to Make It
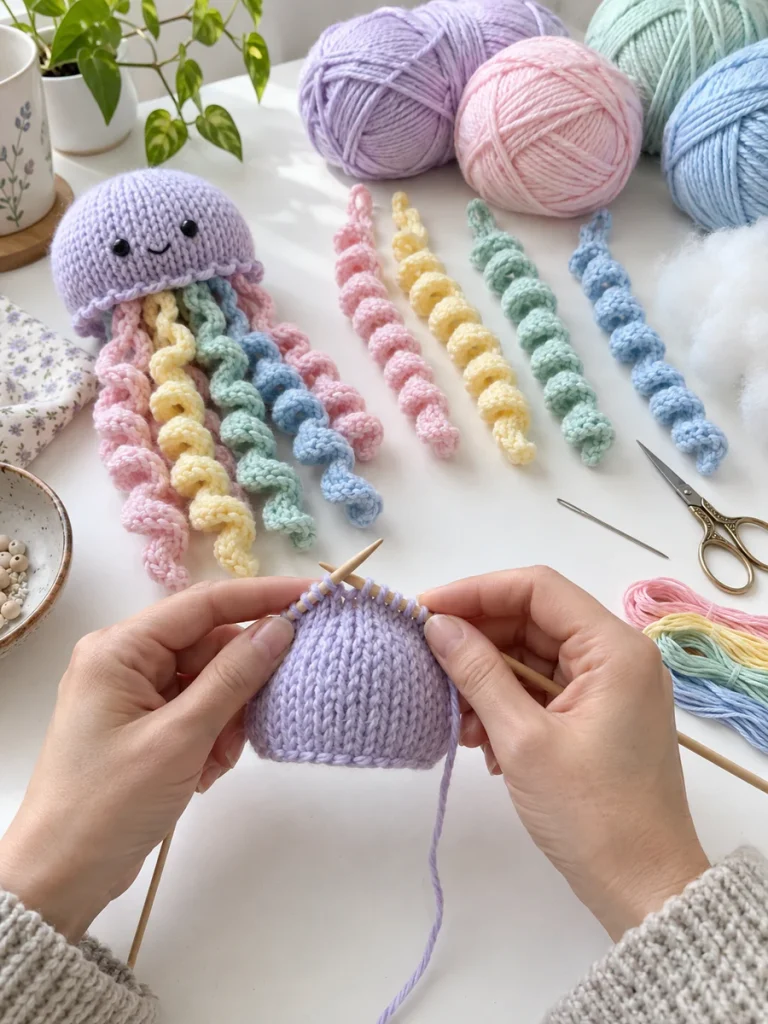
- Knit a rounded dome and stuff it just enough to hold its shape.
- Make several short spiral pieces in different pastel colors and stitch every spiral securely around the lower edge.
- Keep them chunky and relatively short.
- Add a simple embroidered face, then tug-test each join before offering the toy to your cat.
Play and safety tip: Pay extra attention to the curled or projecting parts. If an arm or spiral begins to loosen, repair it before the toy goes back into the play basket.
3. Cottagecore Mushroom Kicker Toy
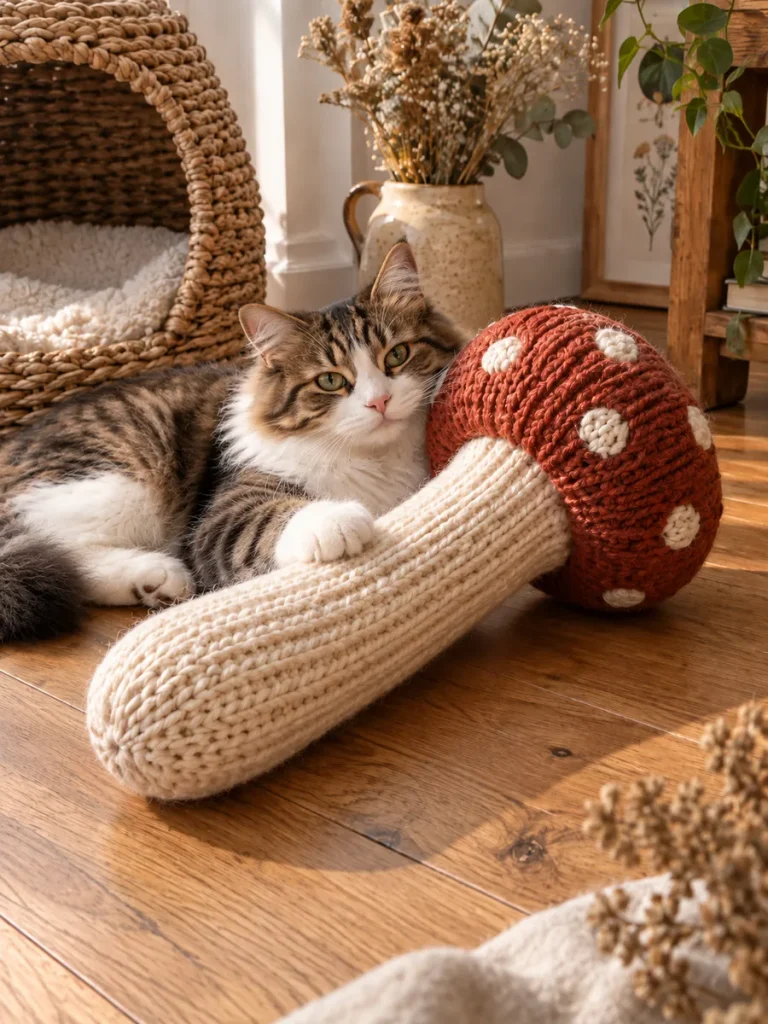
The mushroom kicker is larger than a toss toy, giving a cat enough length to hug with the front paws while kicking with the back feet. The rust-red cap and cream stem also make it one of the strongest seasonal and cottage-style images in the collection.
Things You Will Need
- Cream yarn
- Rust-red yarn
- Cream embroidery yarn
- Stuffing
- Knitting needles
- Tapestry needle
- Optional catnip
How to Make It
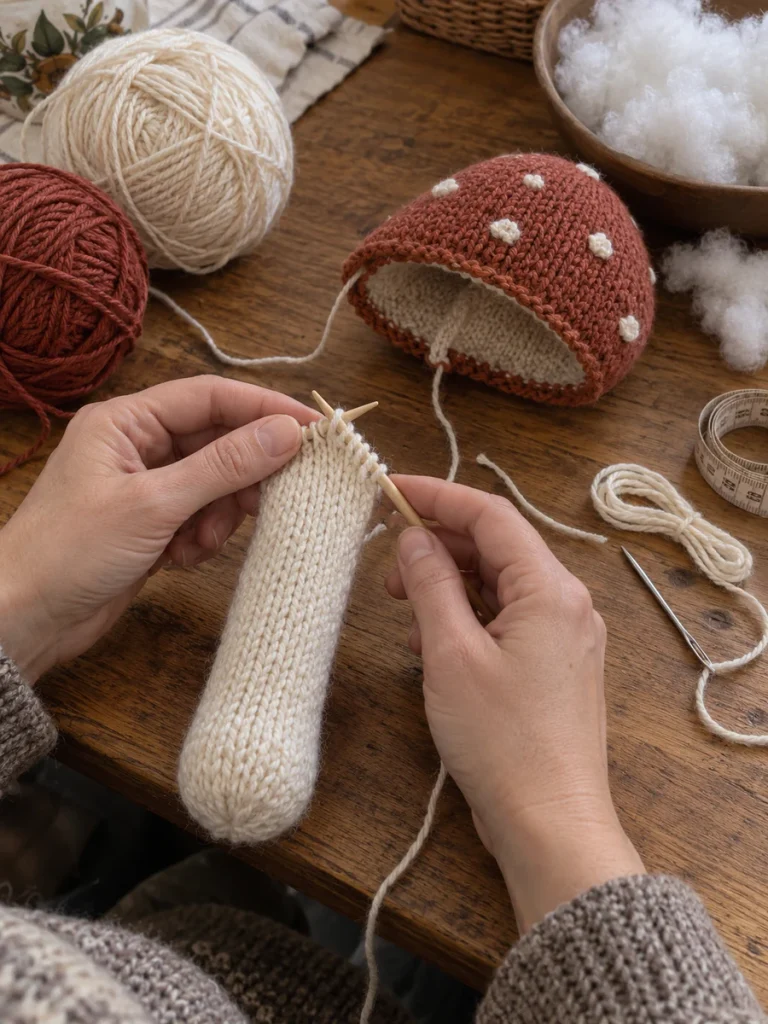
- Knit a long, dense cream tube for the stem and taper the lower end slightly.
- Stuff it firmly enough to resist flattening.
- Knit a wide rounded cap, add cream spots with embroidery, and stitch the cap firmly to the top of the stem.
- If you add catnip, place it deep inside the stuffing rather than near a seam.
Play and safety tip: Before giving a kicker toy to your cat, squeeze and bend it in several places. The stuffing should stay evenly distributed and all decorative pieces should remain firmly attached.
4. Tiny Sushi Roll Cat Toy Set
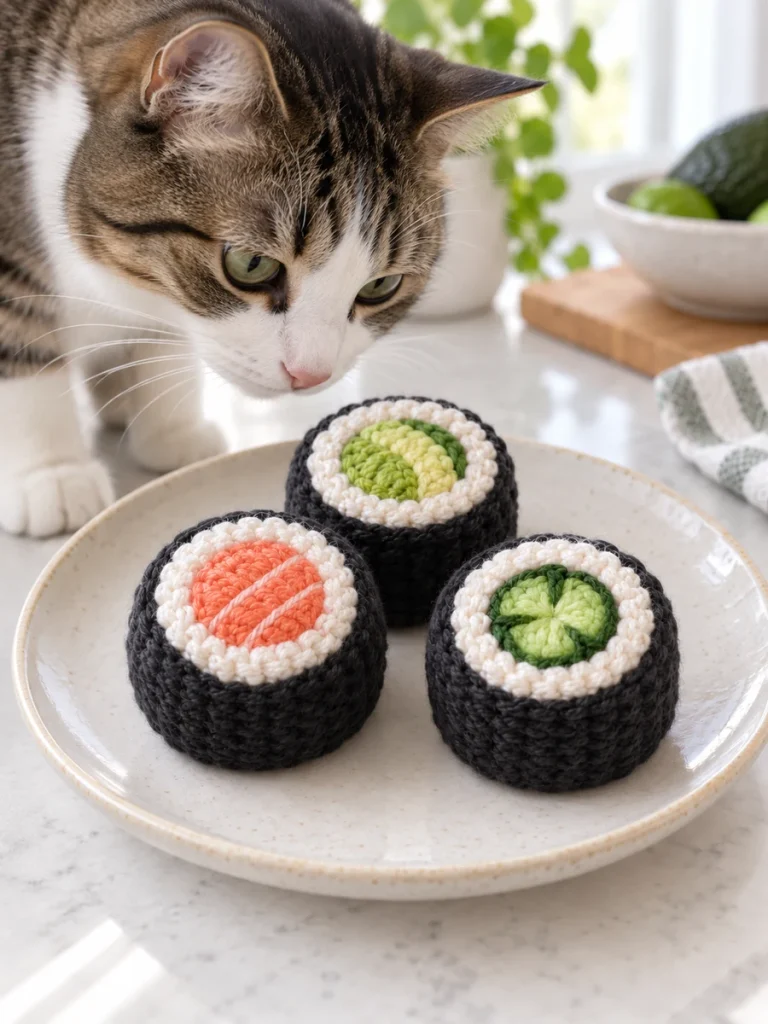
A three-piece sushi set turns one simple shape into a colorful mini collection. Small cylindrical toys are easy to roll, carry, and bat, while the salmon, avocado, and cucumber color combinations make the finished set instantly recognizable in photographs.
Things You Will Need
- Cream yarn
- Charcoal yarn
- Coral yarn
- Light green yarn
- Dark green yarn
- Stuffing
- Knitting needles
- Tapestry needle
How to Make It
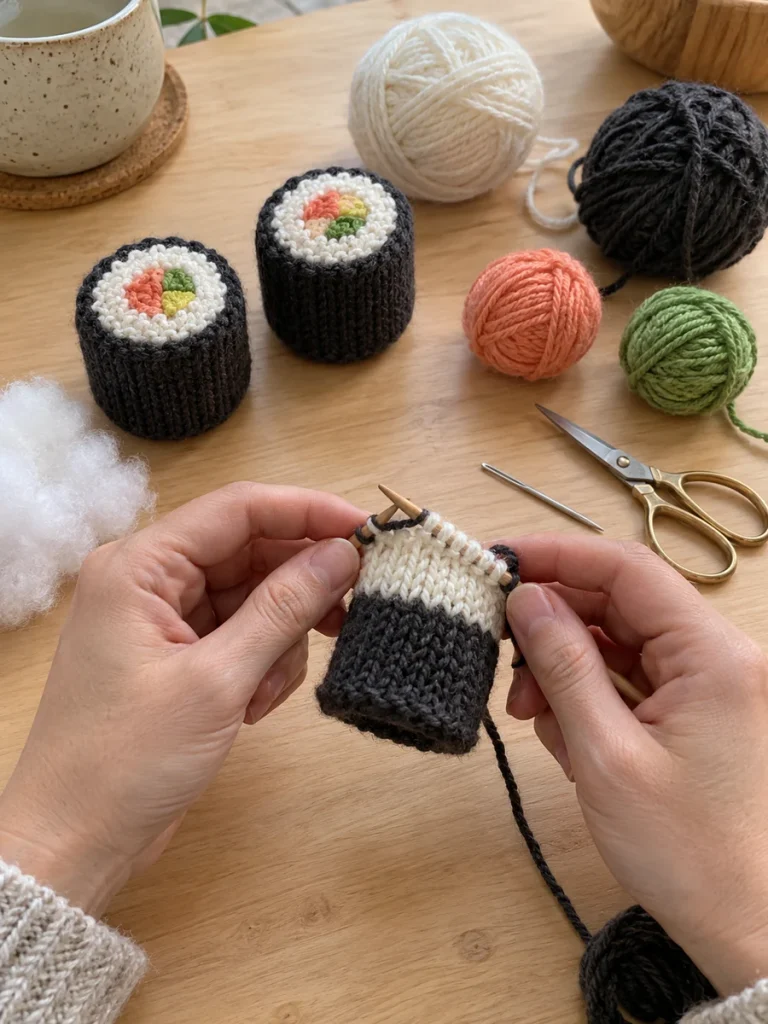
- Use the same small cylinder pattern for all three rolls.
- Work or sew a cream rice-colored ring around each center, then add a dark charcoal outer band.
- Change only the center colors to create salmon, avocado, and cucumber versions.
- Stuff each roll lightly, close both ends carefully, and avoid any bead-like toppings.
Play and safety tip: After finishing, roll or toss the toy gently yourself and inspect the seams again. Small handmade toys get a surprising amount of wear when a cat becomes attached to them.
5. Bumblebee Bouncing Cat Toy
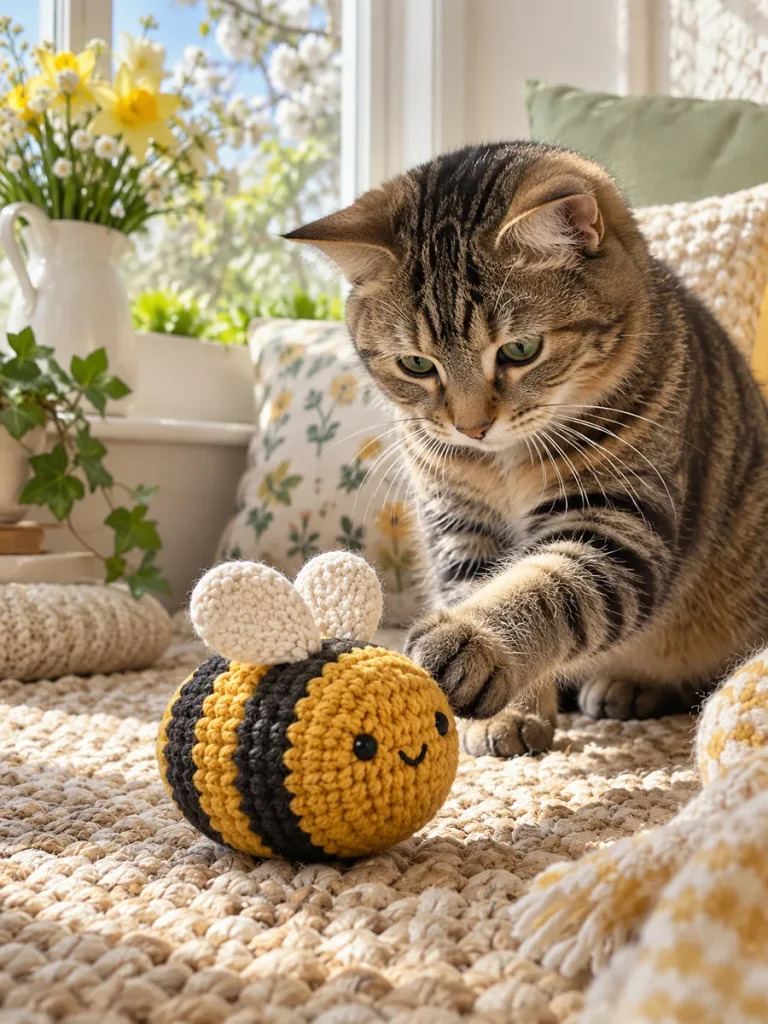
A plump bee rolls in an unpredictable way when swatted, which can encourage short bursts of batting and chasing. The bold mustard and charcoal stripes stand out nicely against neutral floors and rugs.
Things You Will Need
- Mustard-yellow yarn
- Charcoal yarn
- Cream yarn
- Stuffing
- Knitting needles
- Tapestry needle
- Black embroidery yarn
How to Make It
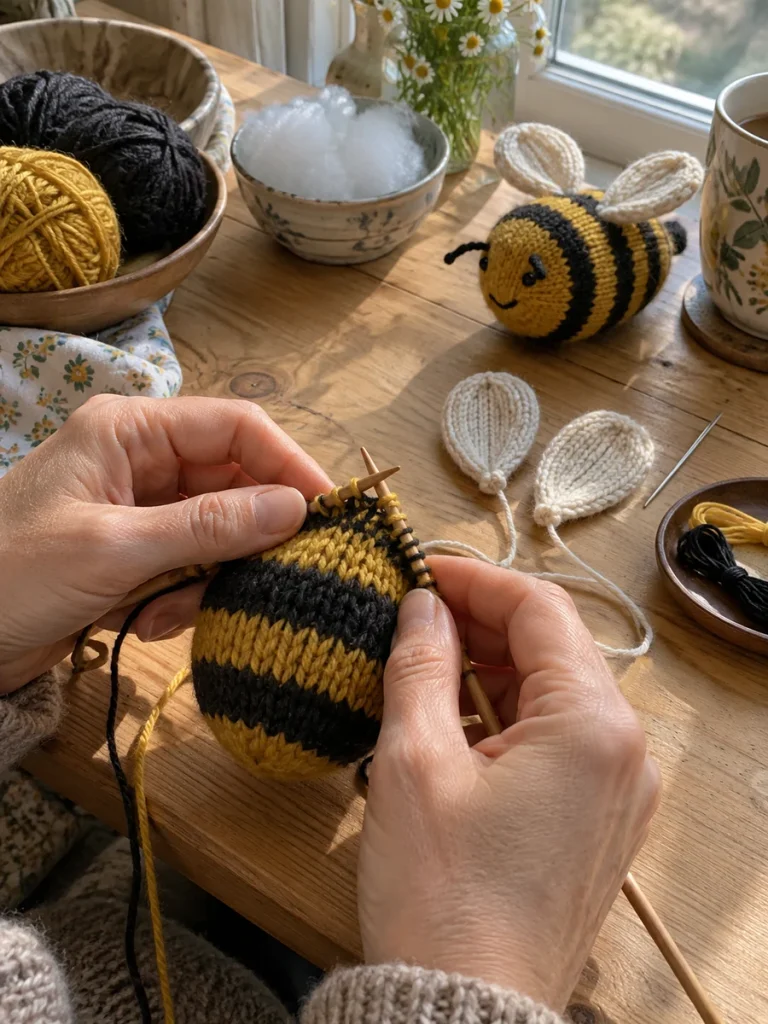
- Alternate mustard and charcoal yarn while knitting a rounded body.
- Stuff the body evenly and close it securely.
- Knit two small cream wings and sew them flat and firmly against the body so they cannot easily be pulled away.
- Embroider the eyes and smile instead of attaching plastic features.
Play and safety tip: After finishing, roll or toss the toy gently yourself and inspect the seams again. Small handmade toys get a surprising amount of wear when a cat becomes attached to them.
6. Pastel Donut Ring Cat Toys
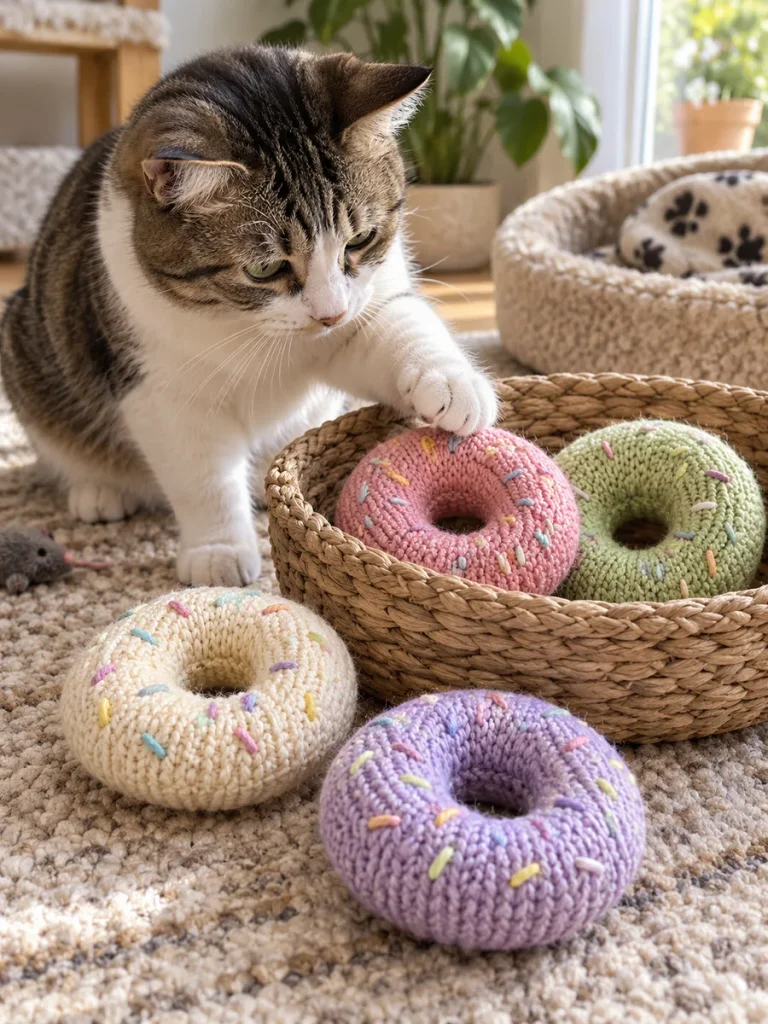
Pastel donut rings are simple stash-busting projects that look especially attractive as a set. Their circular shape gives cats an easy edge to hook with a paw, and the toys can roll a short distance when pushed.
Things You Will Need
- Pink
- Pistachio
- Cream and lavender yarn
- Small embroidery yarn scraps
- Stuffing
- Knitting needles
- Tapestry needle
How to Make It
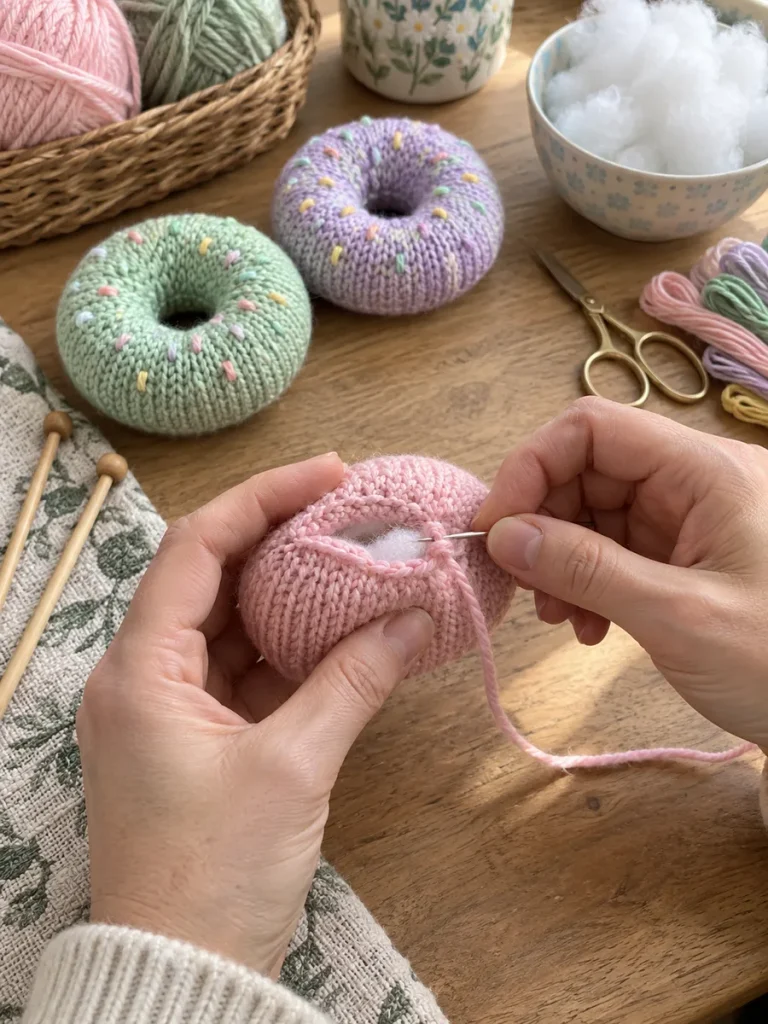
- Knit a narrow tube, add a small amount of stuffing as you work, then curve the tube into a ring.
- Seam the two ends together carefully so the join is smooth.
- Add tiny embroidered sprinkles directly into the surface.
- Repeat in several pastel colors for a coordinated toy basket.
Play and safety tip: After finishing, roll or toss the toy gently yourself and inspect the seams again. Small handmade toys get a surprising amount of wear when a cat becomes attached to them.
7. Chunky Sardine Kicker Toy
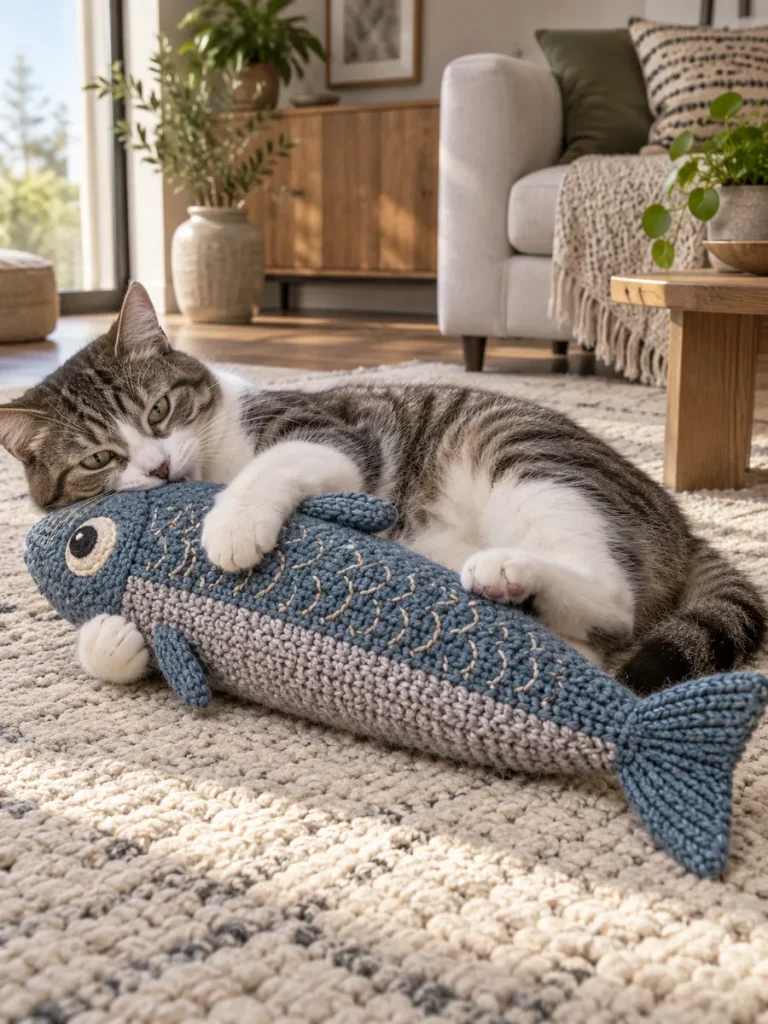
This oversized sardine is built for cats that like wrestling and bunny-kicking. Its long body gives plenty of room for a cat to grip, while the blue-and-gray palette keeps the fish theme obvious without needing lots of small decorations.
Things You Will Need
- Dusty-blue yarn
- Silver-gray yarn
- Cream embroidery yarn
- Stuffing
- Knitting needles
- Tapestry needle
- Optional catnip
How to Make It
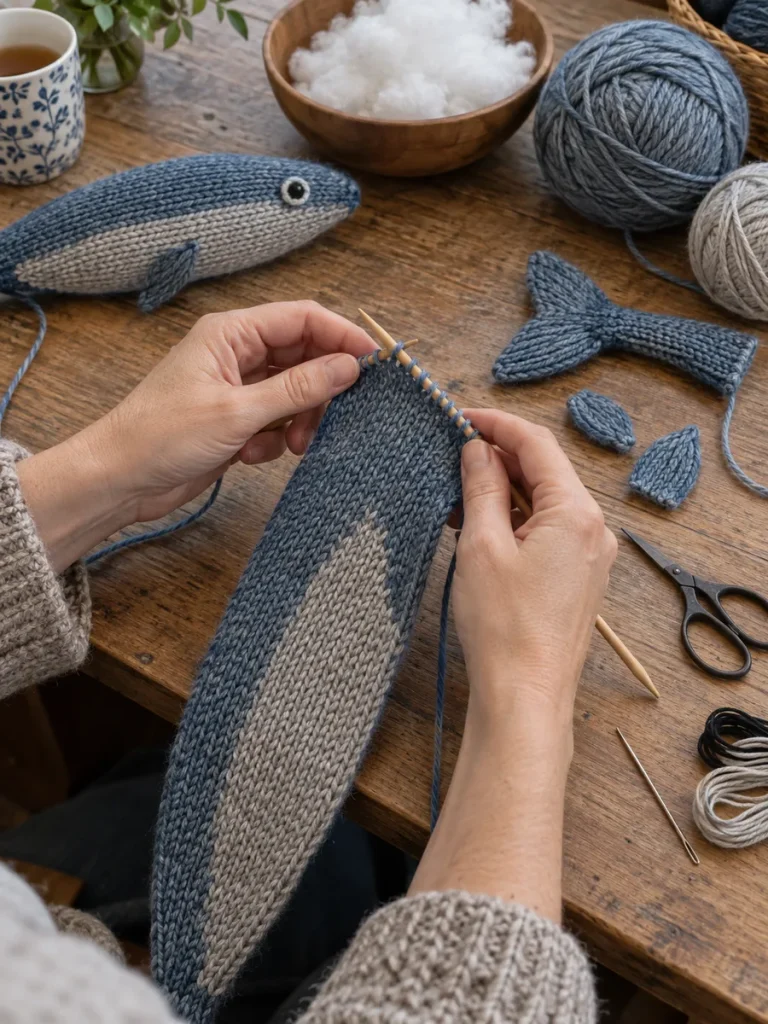
- Knit the long fish body with a gray belly section and a blue upper section.
- Stuff the body firmly, keeping the shape elongated rather than round.
- Knit a sturdy tail and short fins, then sew them on with repeated passes.
- Embroider the eye and scale marks so the surface stays soft.
Play and safety tip: Before giving a kicker toy to your cat, squeeze and bend it in several places. The stuffing should stay evenly distributed and all decorative pieces should remain firmly attached.
8. Cherry Pair Batting Toys
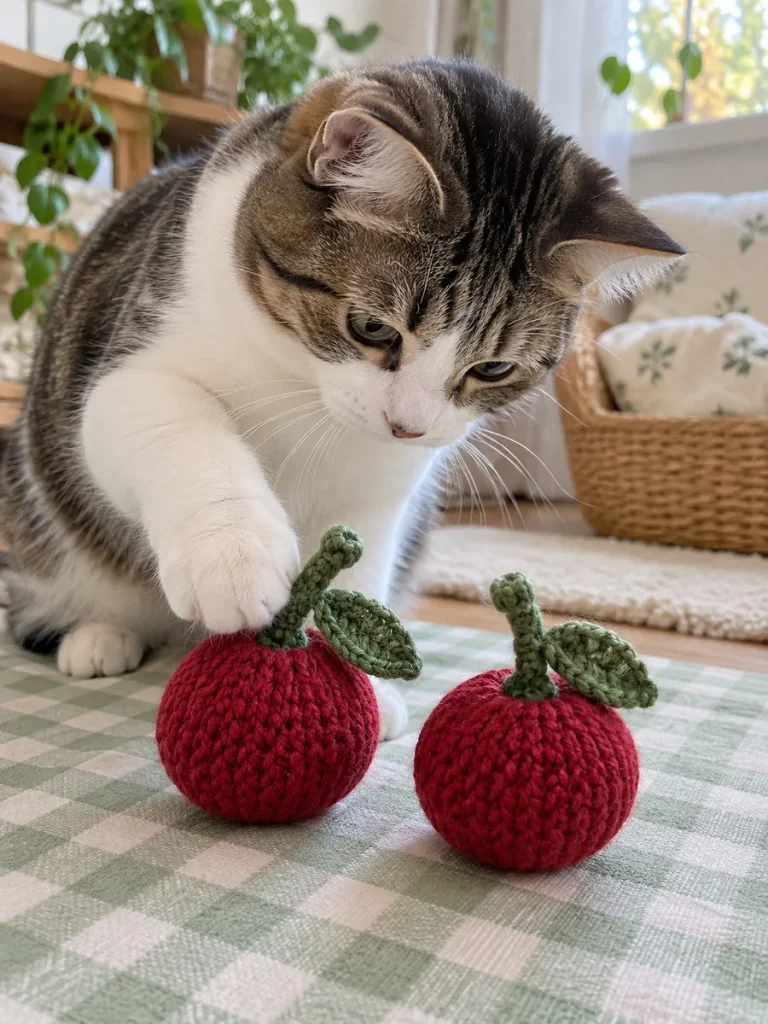
Two separate cherries give the look of a matching pair without creating a long connecting cord. They are small enough to bat across the floor and cute enough to photograph together in a kitchen or cottage-style setting.
Things You Will Need
- Deep red yarn
- Green yarn
- Stuffing
- Knitting needles
- Tapestry needle
How to Make It
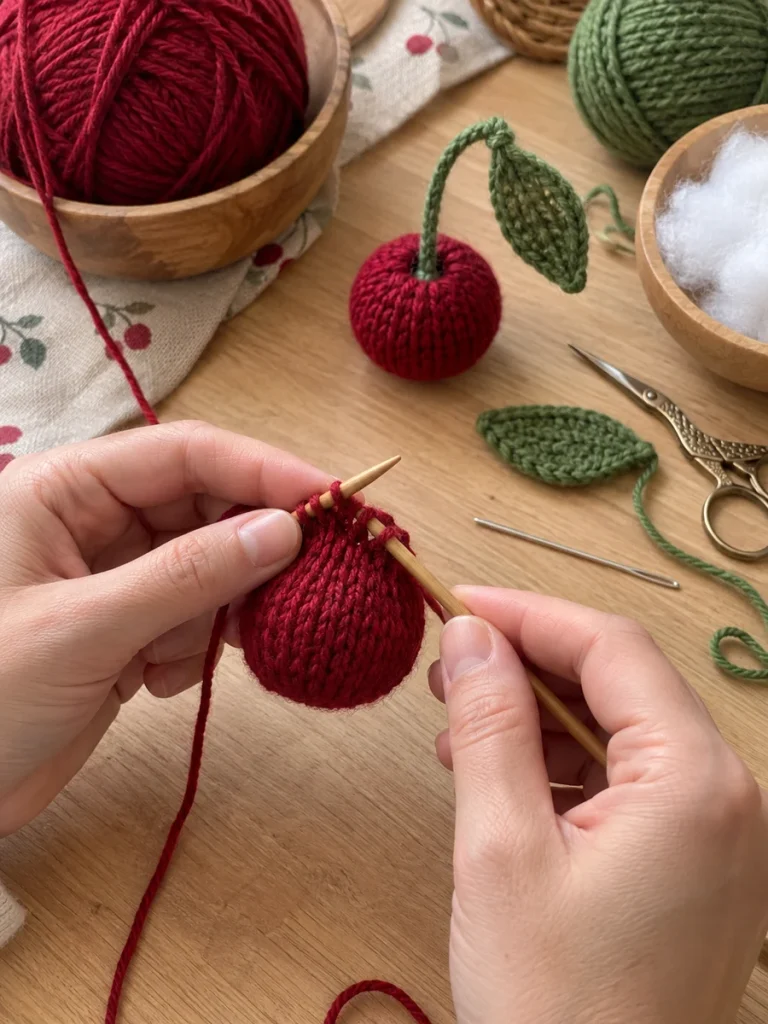
- Knit two small red spheres and stuff them evenly.
- Close each one tightly, then add a short green stem and one securely stitched leaf.
- Keep the stems short and make the cherries fully separate rather than joining them with a long cord.
- Check the leaves after washing to make sure they remain firm.
Play and safety tip: After finishing, roll or toss the toy gently yourself and inspect the seams again. Small handmade toys get a surprising amount of wear when a cat becomes attached to them.
9. Sleepy Cloud Catnip Pillow
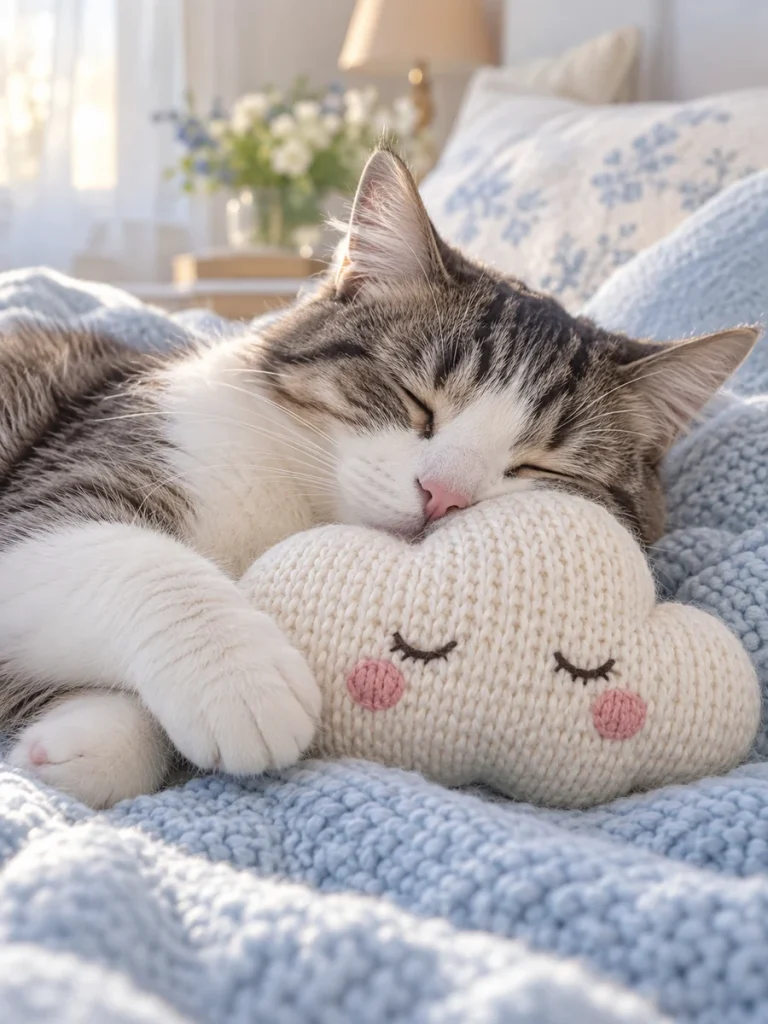
The sleepy cloud works as a soft toss toy and a small cuddle-style pillow. Its flat profile is easy to make from two pieces, and the embroidered face gives it plenty of character without hard accessories.
Things You Will Need
- Ivory yarn
- Black and pink embroidery yarn
- Stuffing
- Knitting needles
- Tapestry needle
- Optional catnip
How to Make It
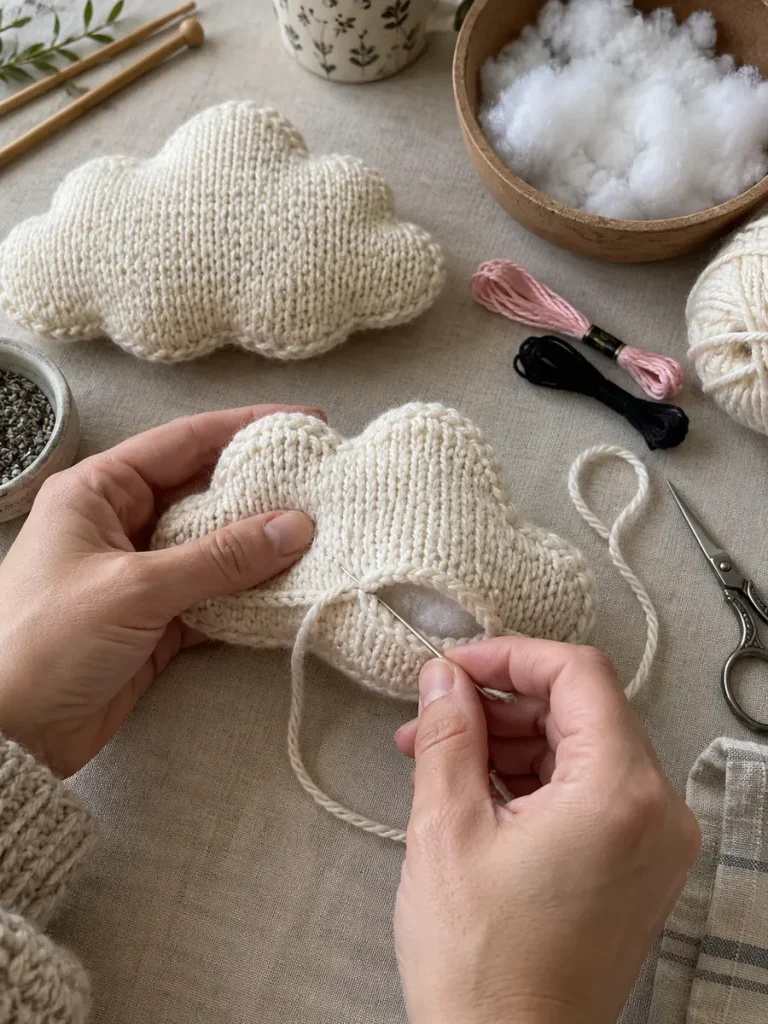
- Knit two matching cloud-shaped panels.
- Embroider the sleepy eyes and cheeks onto the front panel before assembly.
- Sew the panels together around the edge, leaving a small opening, then add stuffing and optional catnip.
- Close the final gap with tight, hidden stitches and smooth the filling into each rounded cloud lobe.
Play and safety tip: After finishing, roll or toss the toy gently yourself and inspect the seams again. Small handmade toys get a surprising amount of wear when a cat becomes attached to them.
10. Mini Avocado Cat Toy
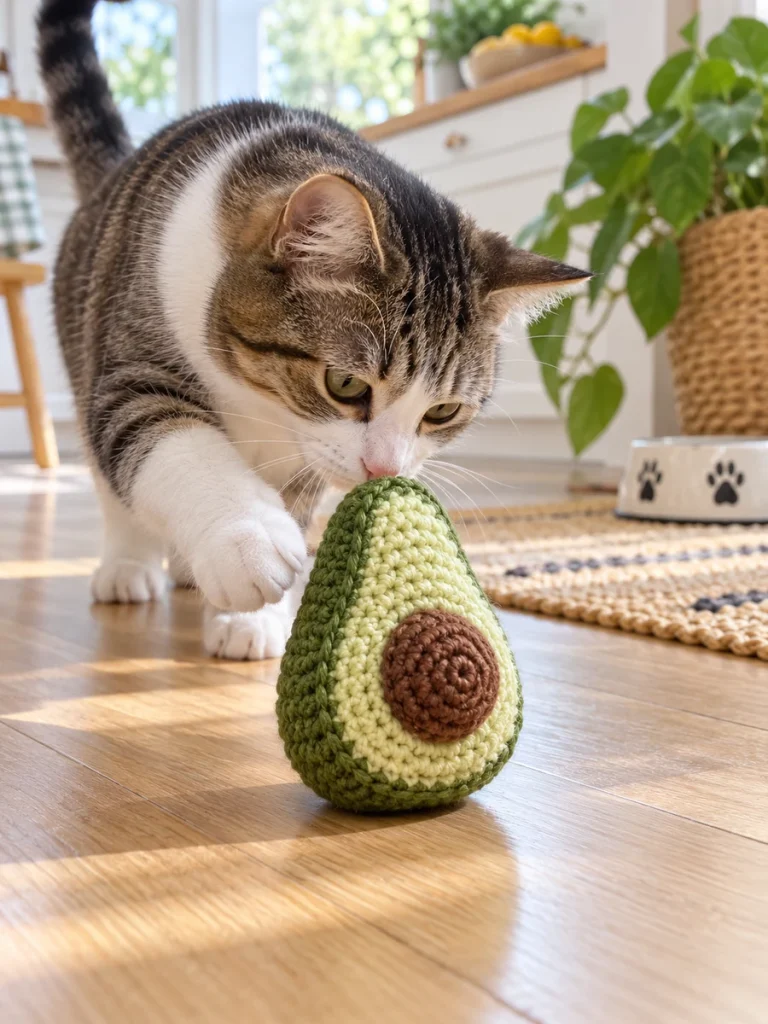
This simple avocado is a bright food-inspired toy with a compact pear shape that is easy for a cat to push or carry. Keeping the pit flat is important because it preserves the soft surface and avoids a detachable decorative piece.
Things You Will Need
- Moss-green yarn
- Pale lime yarn
- Brown embroidery yarn
- Stuffing
- Knitting needles
- Tapestry needle
How to Make It
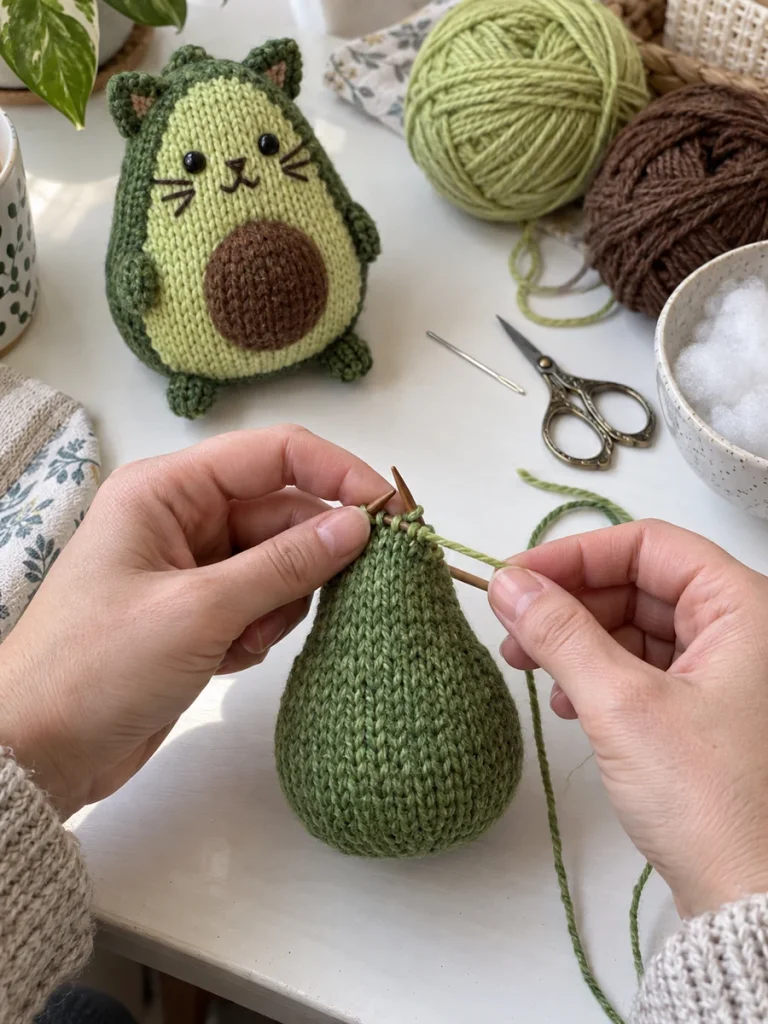
- Knit a pear-shaped green body and a pale lime front section.
- Sew the front panel flat to the body, then embroider a round brown pit directly onto the surface rather than attaching a separate stuffed circle.
- Add stuffing through the back or lower seam, close carefully, and keep the finished toy compact.
Play and safety tip: After finishing, roll or toss the toy gently yourself and inspect the seams again. Small handmade toys get a surprising amount of wear when a cat becomes attached to them.
11. Colorful Caterpillar Roll Toy
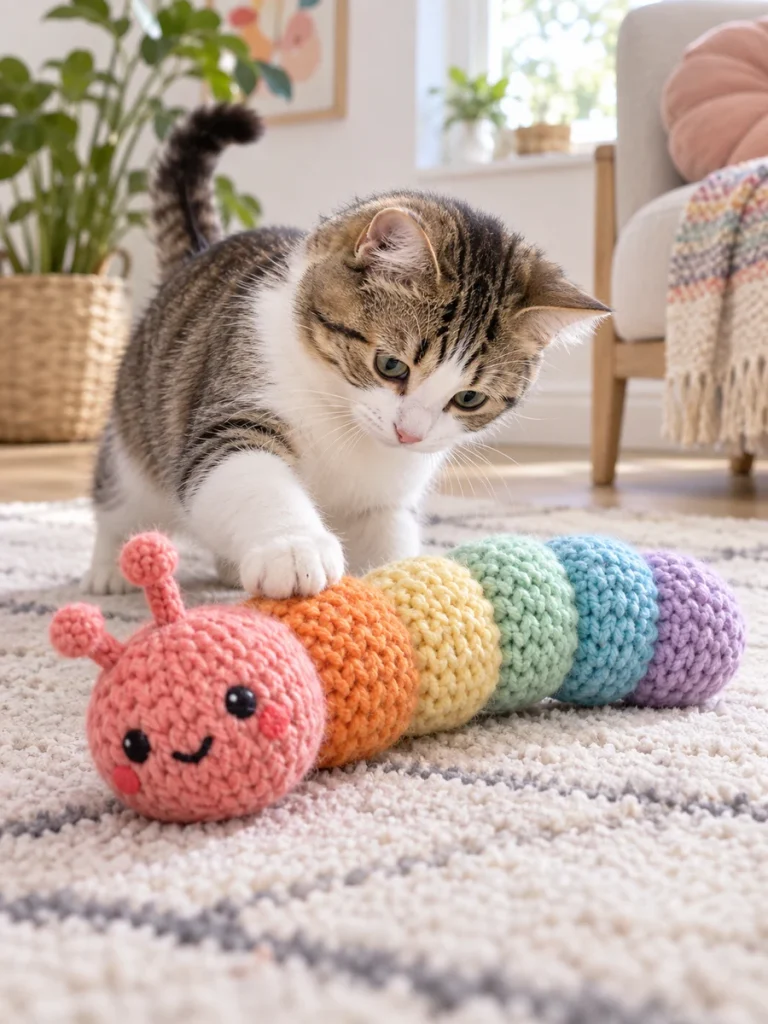
A striped caterpillar is ideal for leftover yarn because every body section can use a different color. The best version is a single continuous stuffed body with visible color changes, not a chain of loosely joined balls.
Things You Will Need
- Coral
- Orange
- Yellow
- Mint
- Aqua and lavender yarn
- Stuffing
- Knitting needles
- Tapestry needle
- Embroidery yarn
How to Make It
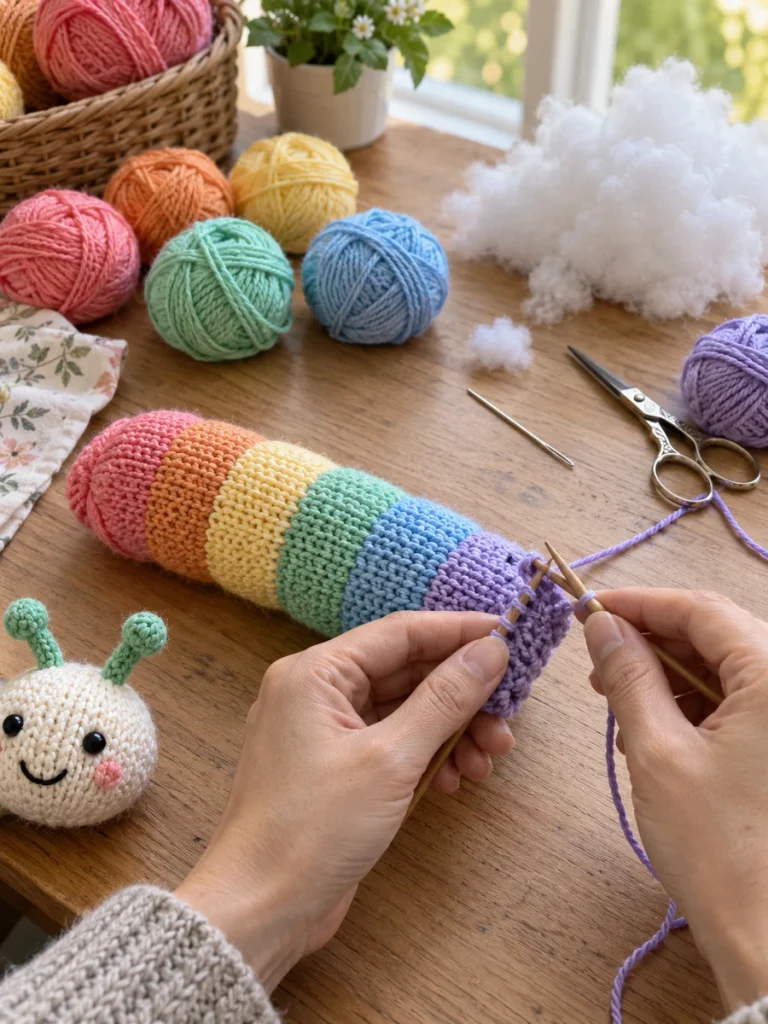
- Work the body as one continuous tube, changing yarn colors at regular intervals.
- Add stuffing gradually so each colored section looks softly segmented without creating separate detachable pieces.
- Shape the head at one end and embroider a simple face.
- Skip long antennae if the toy will be left out for independent play.
Play and safety tip: After finishing, roll or toss the toy gently yourself and inspect the seams again. Small handmade toys get a surprising amount of wear when a cat becomes attached to them.
12. Tiny Frog Beanbag Toy
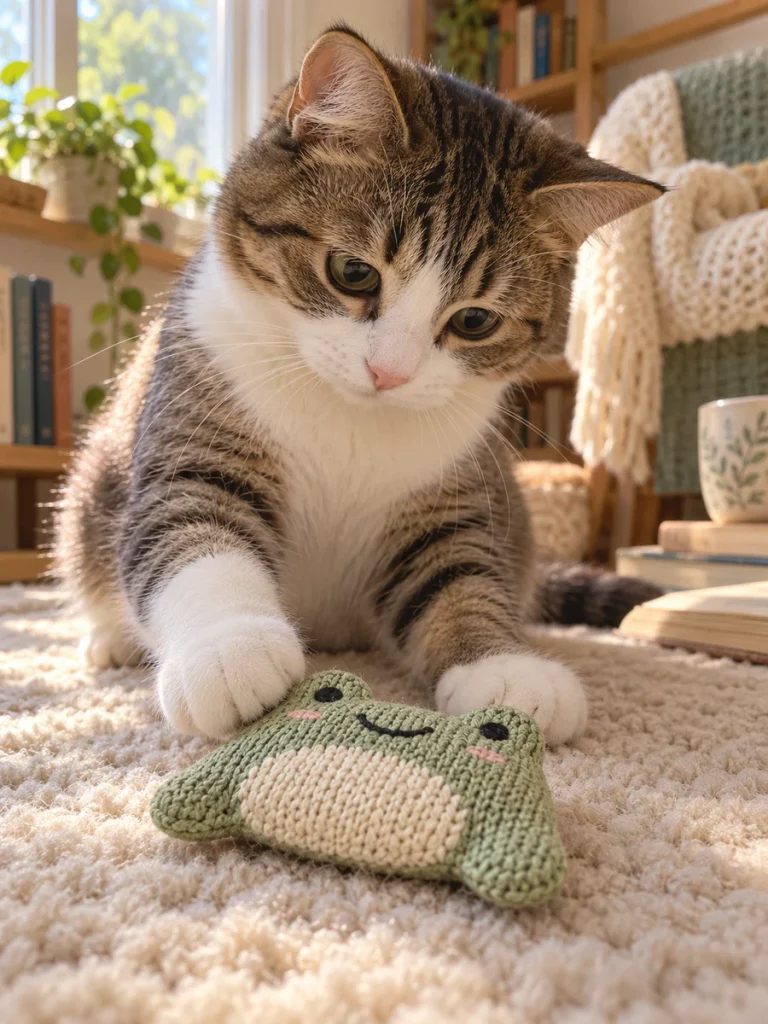
The frog beanbag is flatter than most stuffed toys in this list. That low, squishy shape makes it easy to slide across the floor, and the wide frog silhouette still reads clearly in photos without needing projecting plastic eyes.
Things You Will Need
- Sage-green yarn
- Cream yarn
- A small amount of black embroidery yarn
- Light stuffing
- Knitting needles
- Tapestry needle
How to Make It
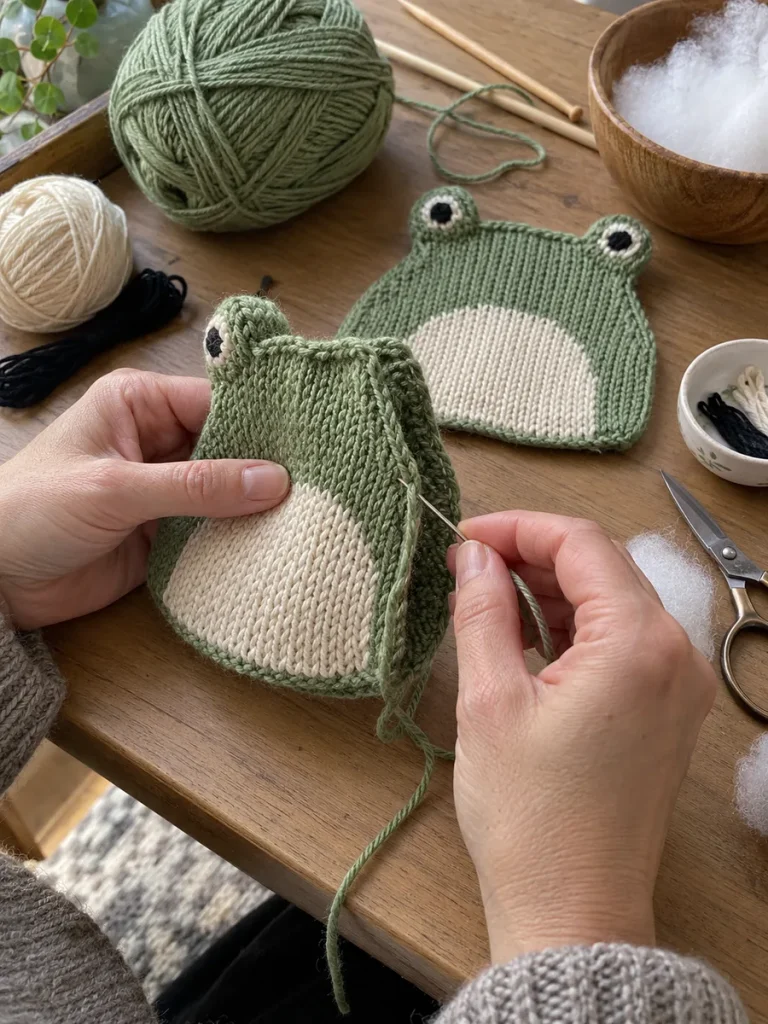
- Knit two flat frog-shaped panels with integrated rounded eye bumps.
- Add a cream belly panel to the front, then embroider the eyes and mouth.
- Sew the front and back together around the edge and add only a modest amount of stuffing so the toy remains soft and beanbag-like rather than becoming a round plush.
Play and safety tip: After finishing, roll or toss the toy gently yourself and inspect the seams again. Small handmade toys get a surprising amount of wear when a cat becomes attached to them.
13. Knitted Goldfish Toss Toy
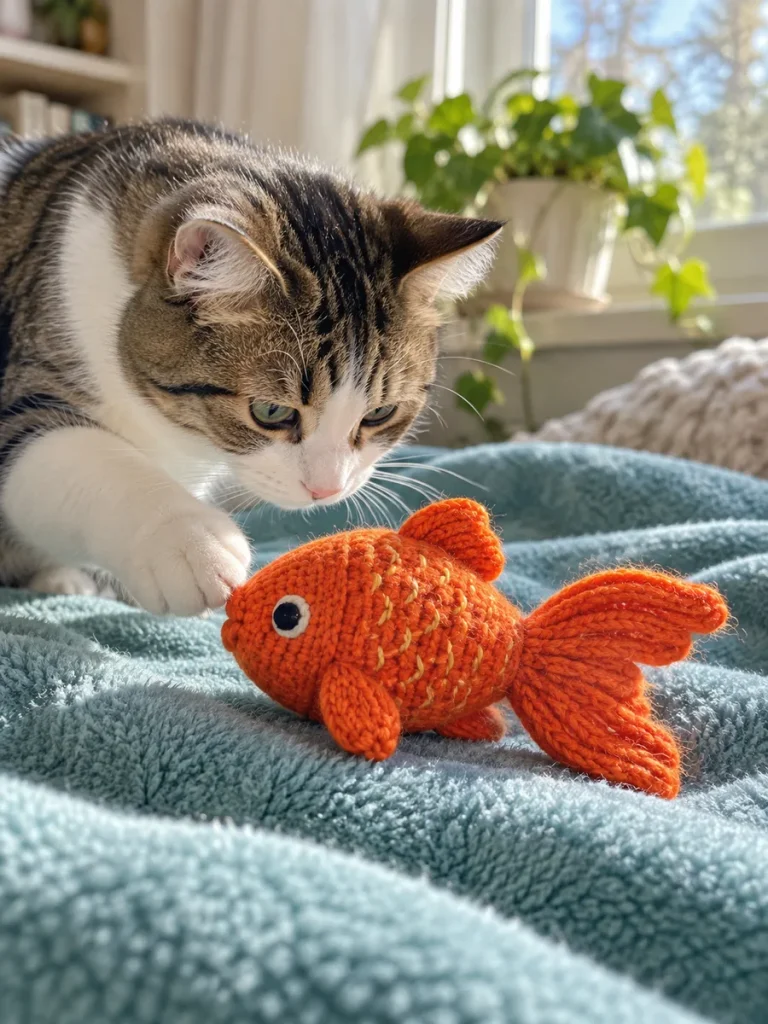
The orange goldfish is small, bright, and easy to spot when it lands beneath furniture or on a patterned rug. Short fins and a sturdy tail give it character while keeping the silhouette compact.
Things You Will Need
- Orange yarn
- Small amount of golden embroidery yarn
- Stuffing
- Knitting needles
- Tapestry needle
- Black embroidery yarn
How to Make It
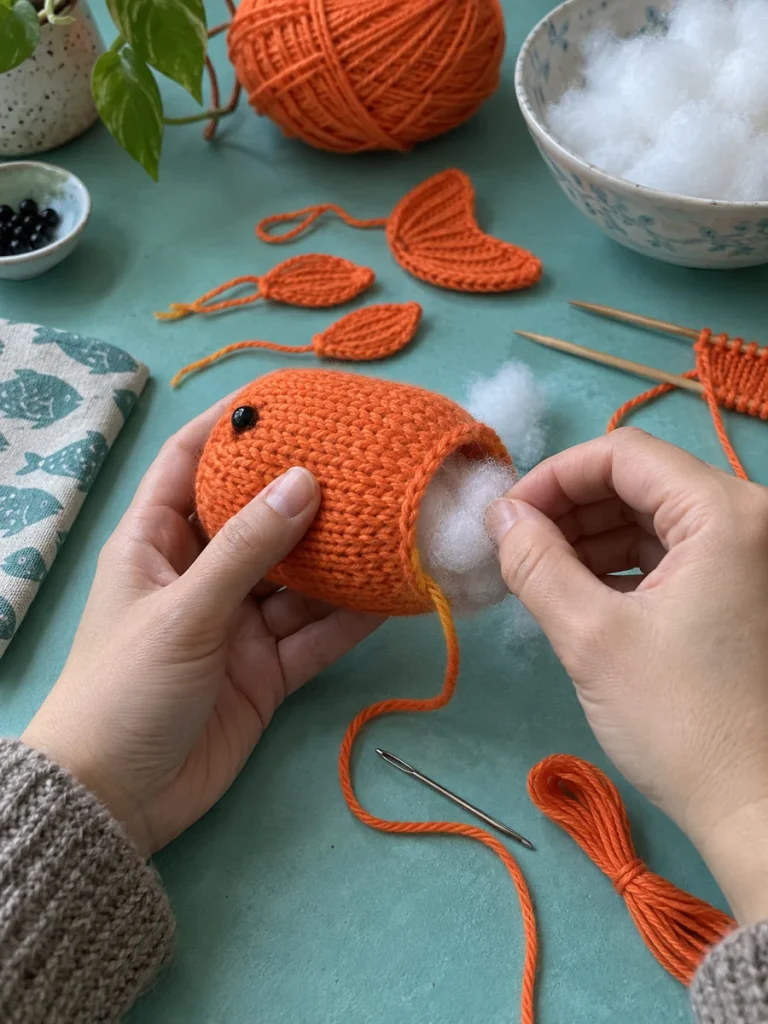
- Knit a rounded fish body and stuff it lightly.
- Make a short, sturdy tail and two small fins, then stitch them to the body with several passes.
- Add scale marks and an eye with embroidery.
- Avoid plastic safety eyes, especially on toys designed for energetic batting.
Play and safety tip: After finishing, roll or toss the toy gently yourself and inspect the seams again. Small handmade toys get a surprising amount of wear when a cat becomes attached to them.
14. Watermelon Wedge Cat Toy
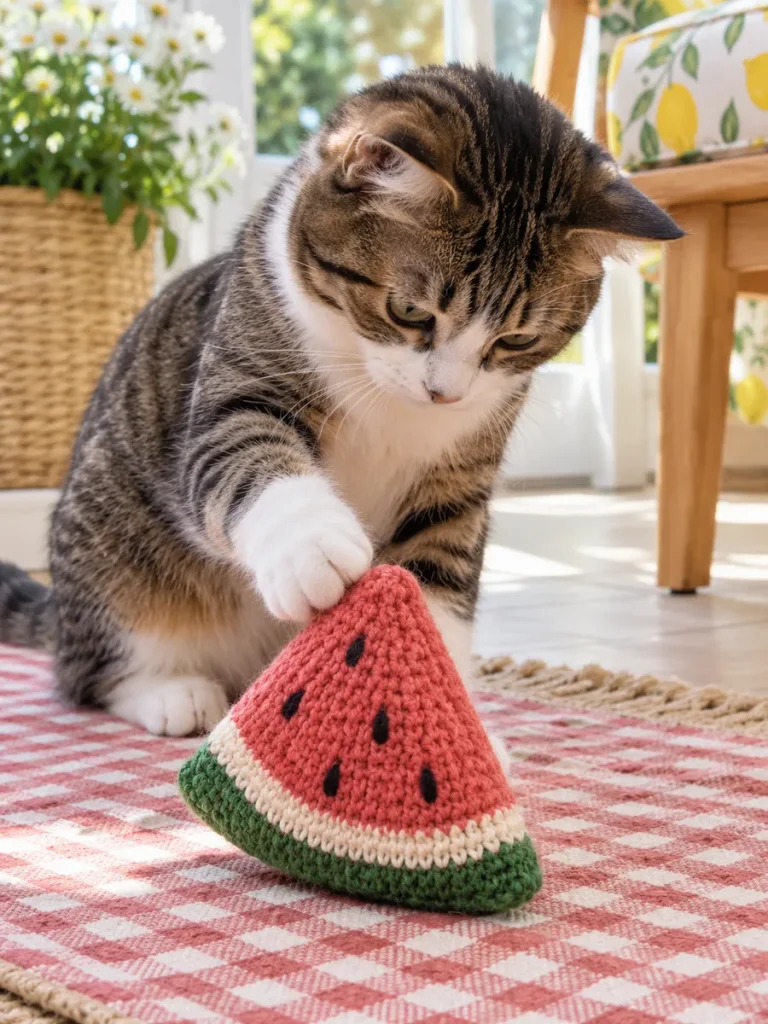
A watermelon wedge brings strong summer color to the collection. The triangular shape is different from the usual ball or mouse, and the flat embroidered seeds keep the design simple and durable.
Things You Will Need
- Coral-red yarn
- Cream yarn
- Green yarn
- Black embroidery yarn
- Stuffing
- Knitting needles
- Tapestry needle
How to Make It
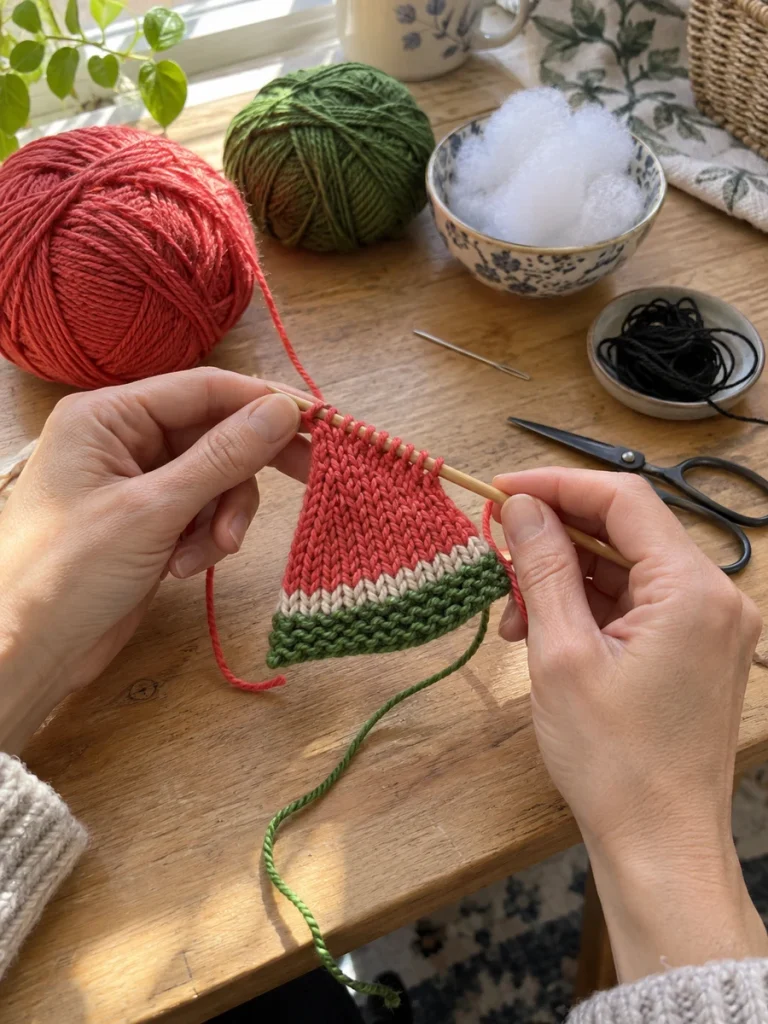
- Knit or assemble a triangular wedge with a red center, thin cream band, and green rind.
- Stuff the wedge enough to keep its shape without making it hard.
- Embroider several black seeds onto the red section, close the final seam tightly, and check all three corners for exposed stuffing.
Play and safety tip: After finishing, roll or toss the toy gently yourself and inspect the seams again. Small handmade toys get a surprising amount of wear when a cat becomes attached to them.
15. Mini Knitted Octopus Toy
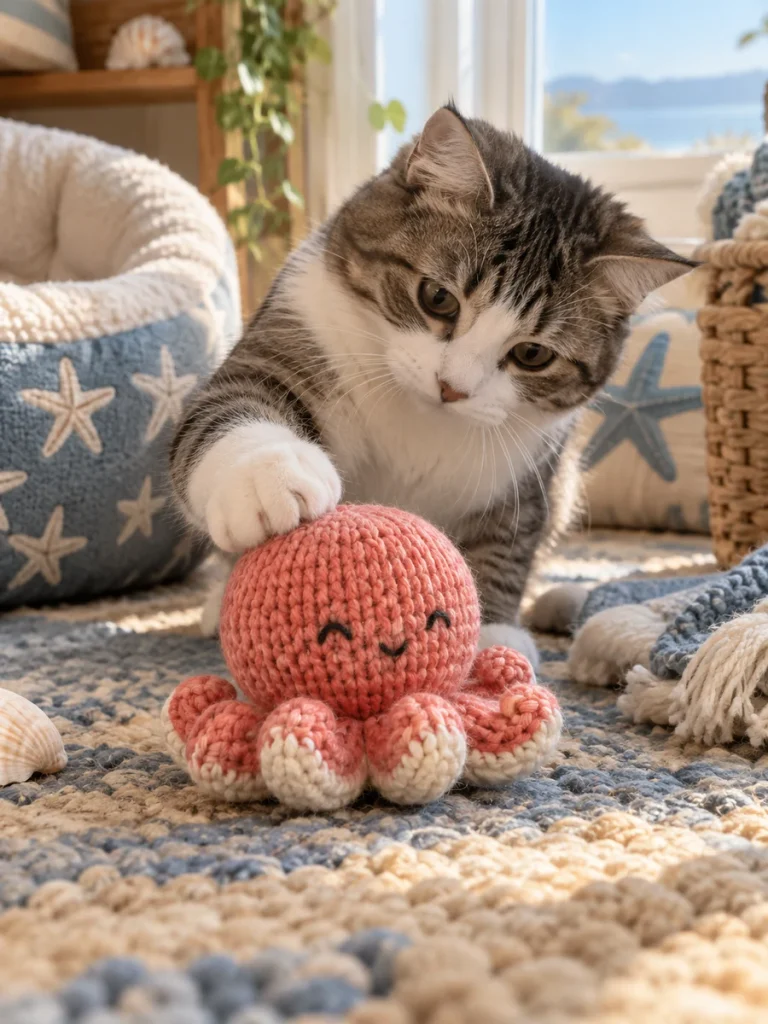
A mini octopus works best with a round head and several short, chunky arms. The arms create texture and movement for batting, but keeping them short is safer than using long trailing tentacles.
Things You Will Need
- Coral or dusty pink yarn
- Cream yarn
- Stuffing
- Knitting needles
- Tapestry needle
- Black embroidery yarn
How to Make It
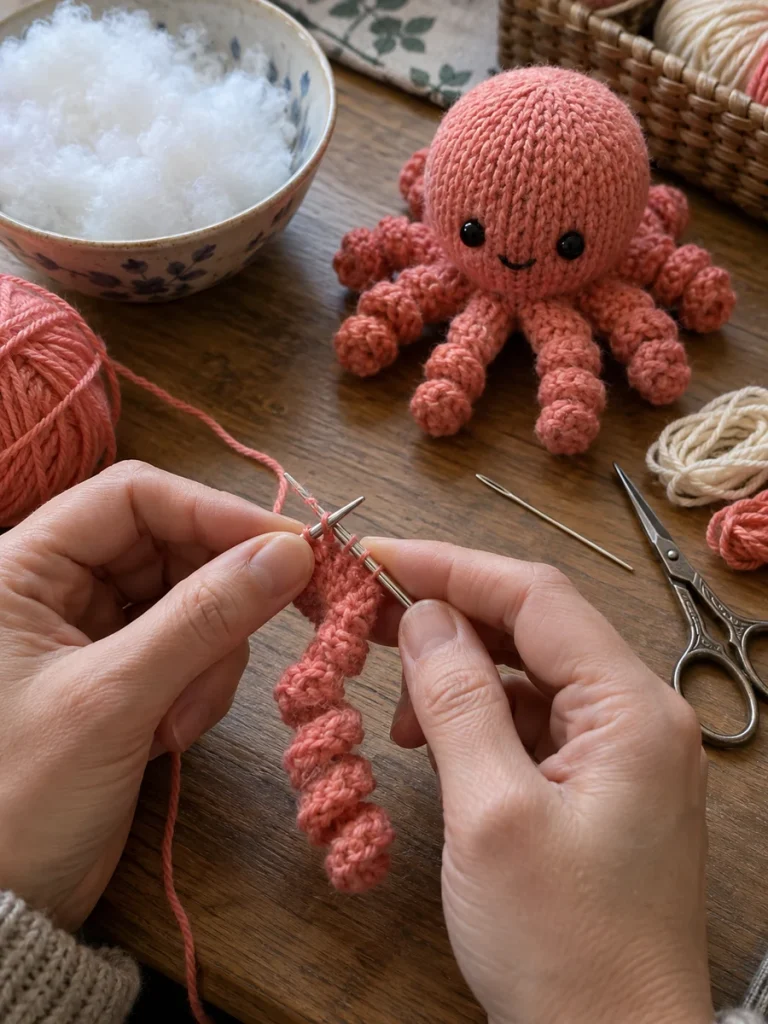
- Knit a rounded head and stuff it evenly.
- Make several short curved arms, or work them into the lower edge if your pattern allows.
- Stitch every arm on firmly and keep the ends compact.
- Embroider the face directly onto the head so there are no hard eyes to pull free.
Play and safety tip: Pay extra attention to the curled or projecting parts. If an arm or spiral begins to loosen, repair it before the toy goes back into the play basket.
16. Carrot Bunny-Kicker Toy
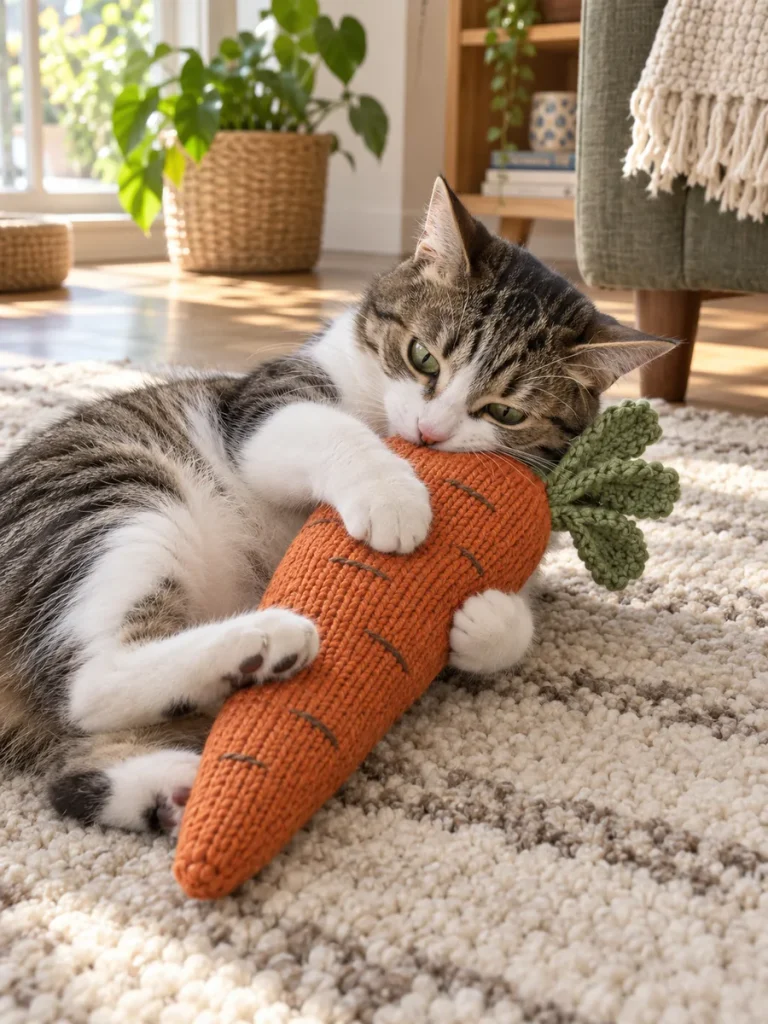
The long carrot is a playful spring design and a practical kicker shape at the same time. Cats can wrap their front legs around the orange body while kicking the lower half with their back feet.
Things You Will Need
- Burnt-orange yarn
- Sage-green yarn
- Dark orange or brown embroidery yarn
- Stuffing
- Knitting needles
- Tapestry needle
How to Make It
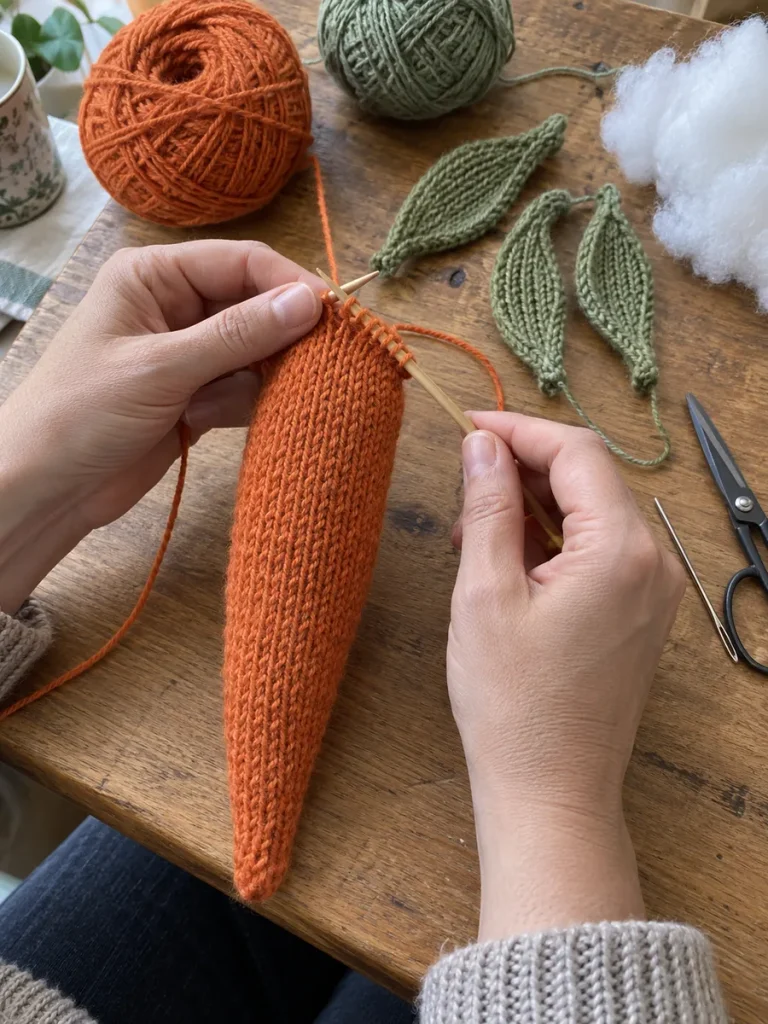
- Knit a long tapered orange tube, adding stuffing gradually.
- Shape the pointed end neatly, then close the wider top.
- Knit several short green leaf pieces and sew them firmly into the top seam.
- Add a few horizontal carrot marks with embroidery.
- Keep the leafy section chunky and short.
Play and safety tip: Before giving a kicker toy to your cat, squeeze and bend it in several places. The stuffing should stay evenly distributed and all decorative pieces should remain firmly attached.
17. Retro Daisy Toss Toy
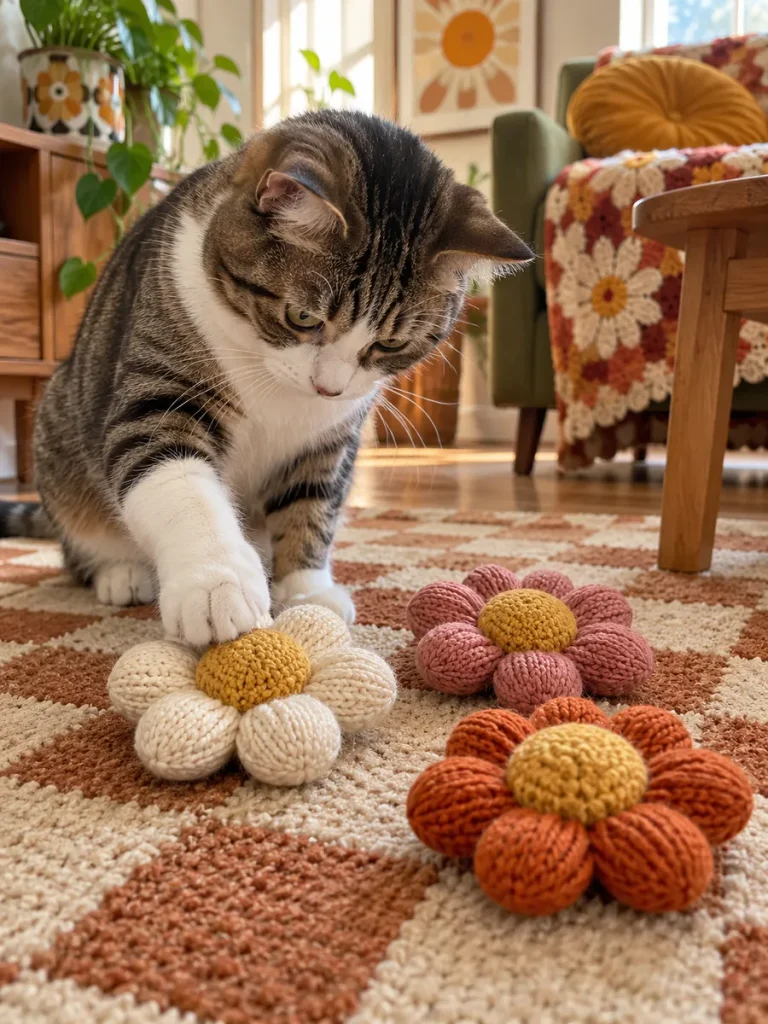
Retro daisies are cheerful, flat toys that photograph beautifully in sets of cream, dusty pink, and burnt orange. Their padded centers and rounded petals give cats multiple edges to hook and bat.
Things You Will Need
- Mustard-yellow yarn
- Cream yarn
- Dusty pink yarn
- Burnt orange yarn
- Stuffing
- Knitting needles
- Tapestry needle
How to Make It
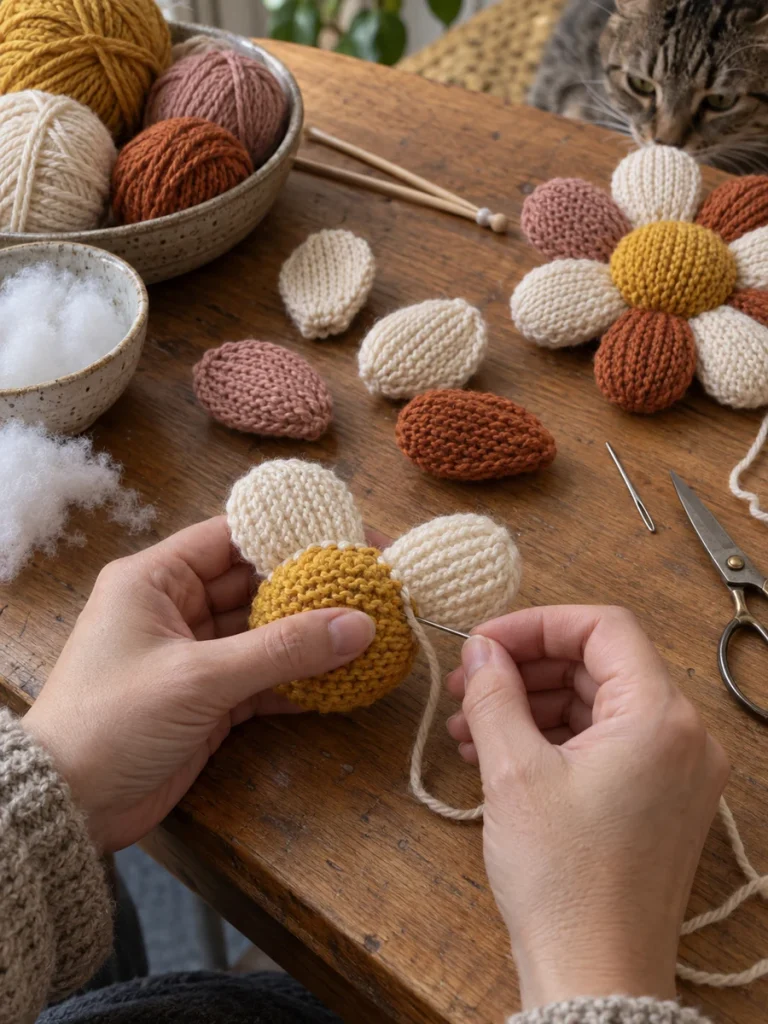
- Knit a small padded center, then make rounded petals in your chosen color.
- Sew each petal securely around the center, spacing them evenly.
- Alternatively, use a pattern that works the flower as one piece.
- Keep all joins hidden and avoid decorative buttons in the center.
Play and safety tip: After finishing, roll or toss the toy gently yourself and inspect the seams again. Small handmade toys get a surprising amount of wear when a cat becomes attached to them.
18. Cute Milk Carton Cat Toy
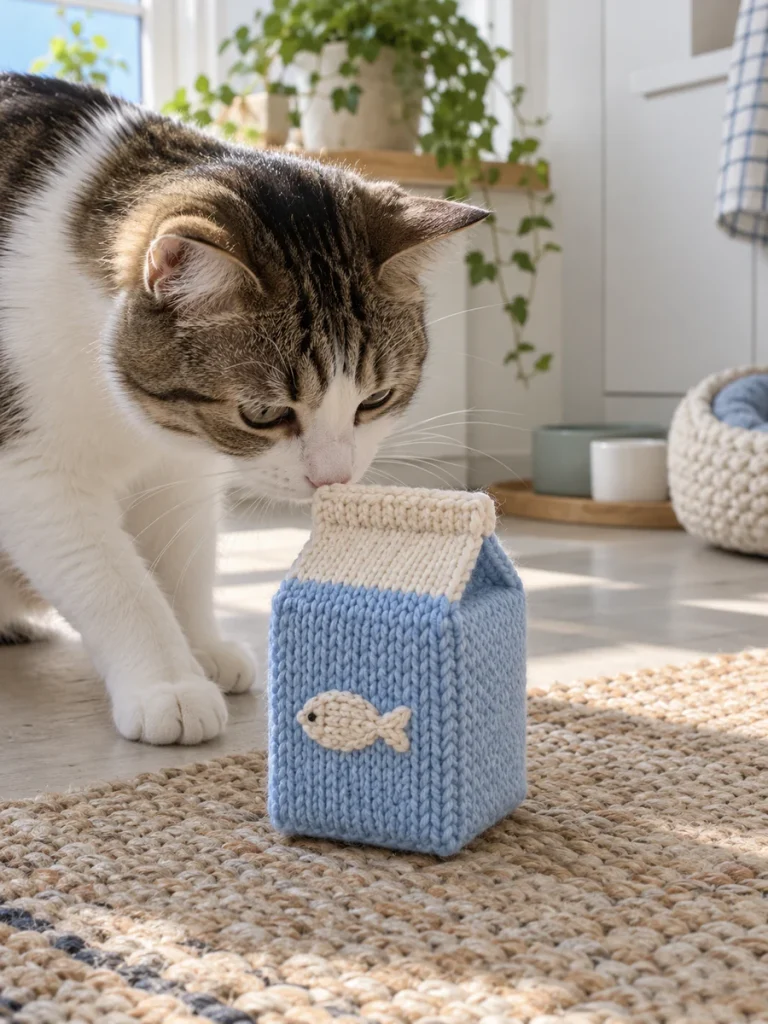
A soft milk-carton shape adds a quirky household object to the lineup. The boxy body is especially fun beside food-inspired toys such as sushi and avocado, but it should stay completely soft and free of rigid inserts.
Things You Will Need
- Powder-blue yarn
- Cream yarn
- A little cream or dark yarn for a fish motif
- Stuffing
- Knitting needles
- Tapestry needle
How to Make It
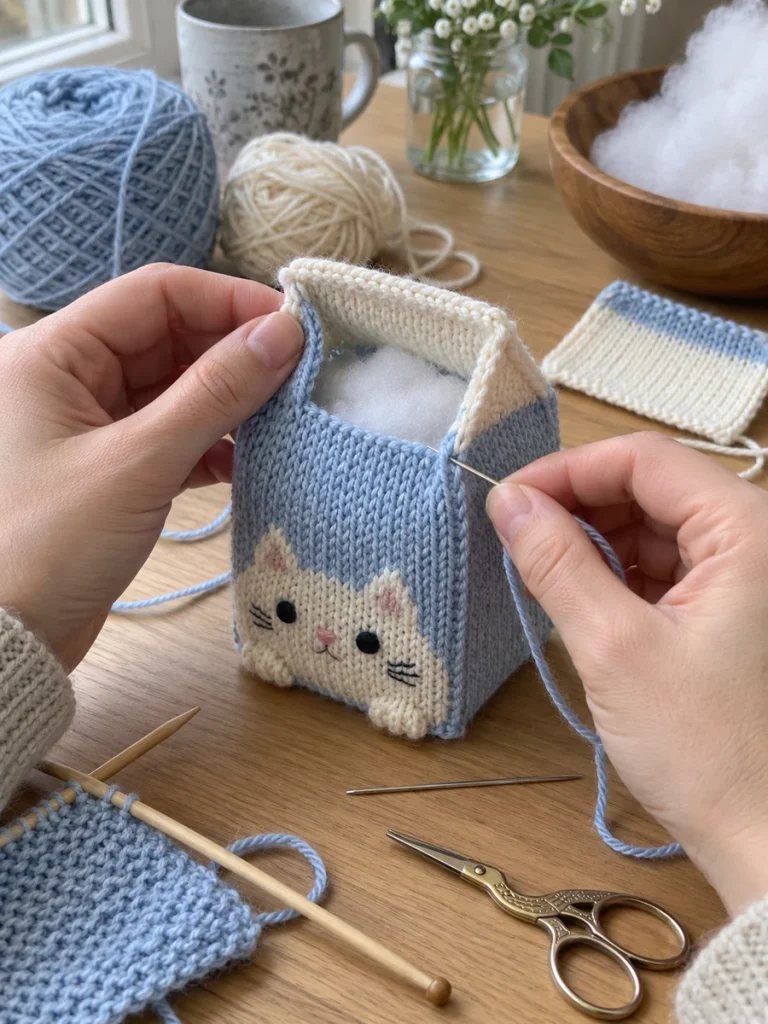
- Knit rectangular panels for the carton body, then seam them into a small soft box.
- Add stuffing before closing the top.
- Shape the cream upper section into a simple folded-carton silhouette and stitch it firmly.
- Embroider or knit a flat fish motif on the front, keeping the finished toy soft on every side.
Play and safety tip: After finishing, roll or toss the toy gently yourself and inspect the seams again. Small handmade toys get a surprising amount of wear when a cat becomes attached to them.
19. Little Whale Catnip Toy
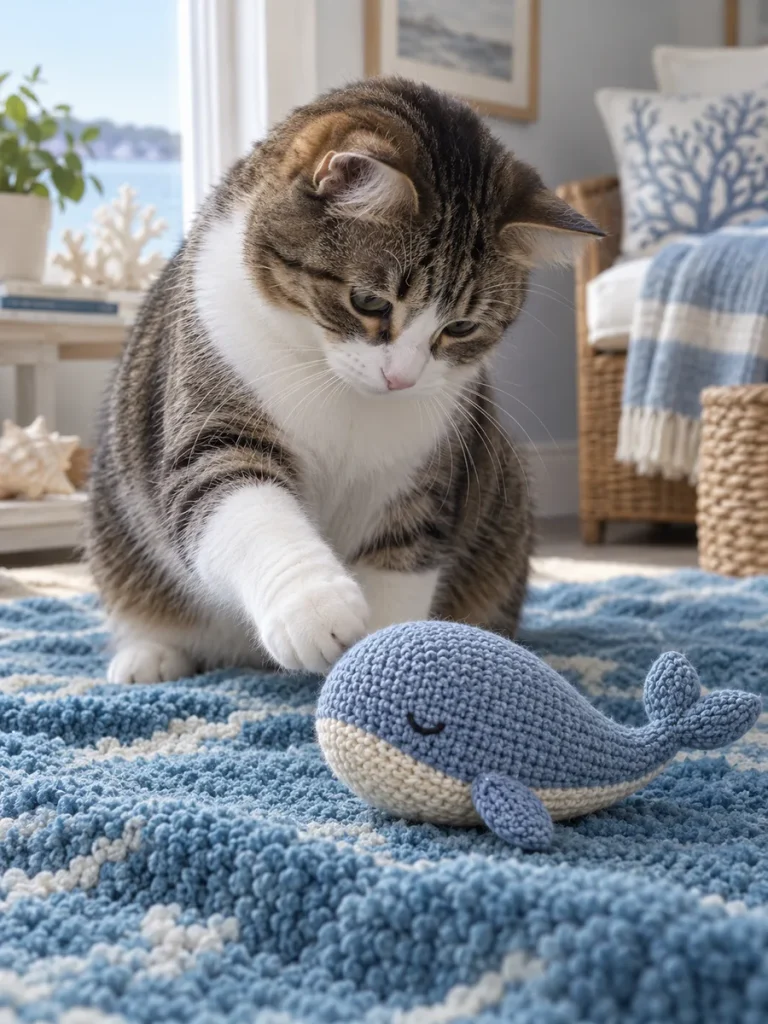
The small whale is a calm, rounded toy with short fins and a compact tail. Its soft blue and cream palette works nicely for coastal pet decor, while the shape is easy for a cat to nudge or carry.
Things You Will Need
- Powder-blue yarn
- Cream yarn
- Stuffing
- Knitting needles
- Tapestry needle
- Black embroidery yarn
- Optional catnip
How to Make It
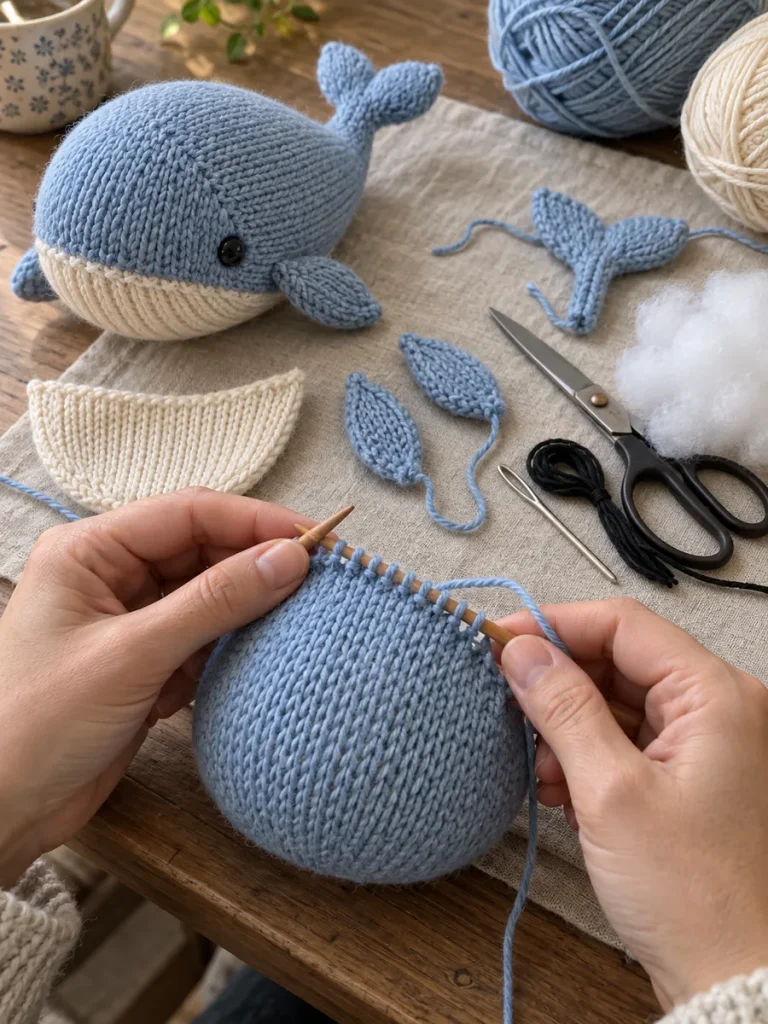
- Knit the rounded blue body and add a cream underside.
- Stuff the toy gently so the whale stays soft.
- Create two short fins and a compact fluked tail, then stitch them on securely.
- Embroider a sleepy eye.
- If using catnip, distribute a small amount through the center of the stuffing.
Play and safety tip: After finishing, roll or toss the toy gently yourself and inspect the seams again. Small handmade toys get a surprising amount of wear when a cat becomes attached to them.
20. Pumpkin Spice Kicker Toy
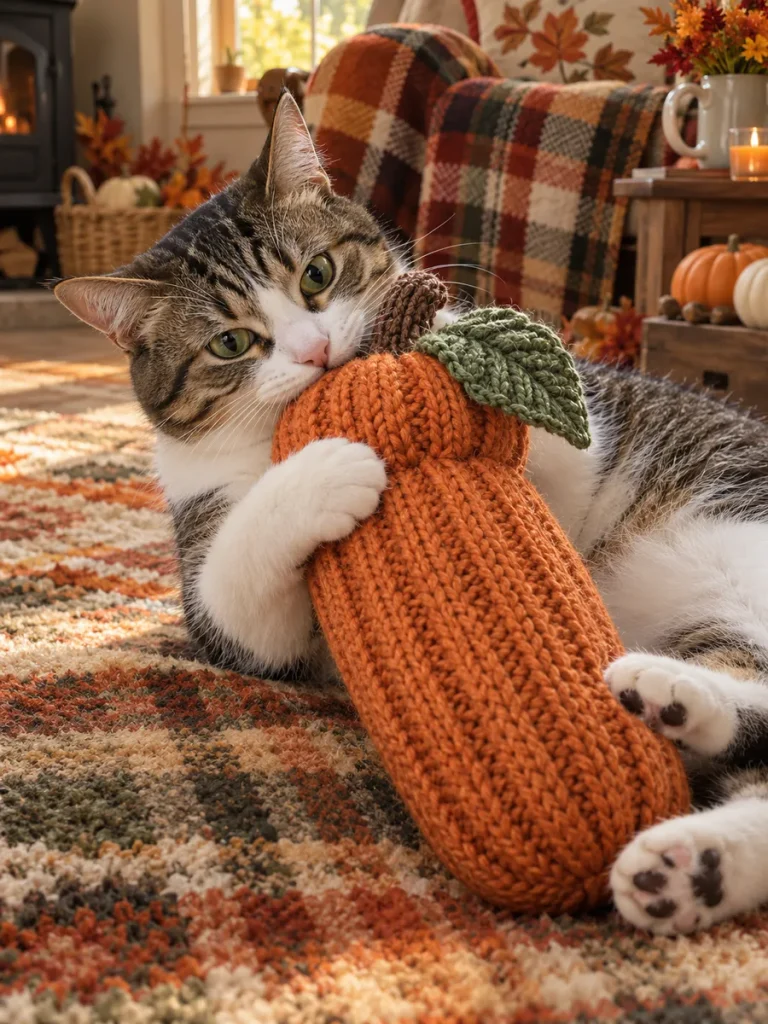
This elongated pumpkin is designed for fall styling without sacrificing play value. Ribbed orange knitting creates the pumpkin look, while the long shape gives cats enough room for wrestling and kicking.
Things You Will Need
- Burnt-orange yarn
- Brown yarn
- Sage-green yarn
- Stuffing
- Knitting needles
- Tapestry needle
- Optional catnip
How to Make It
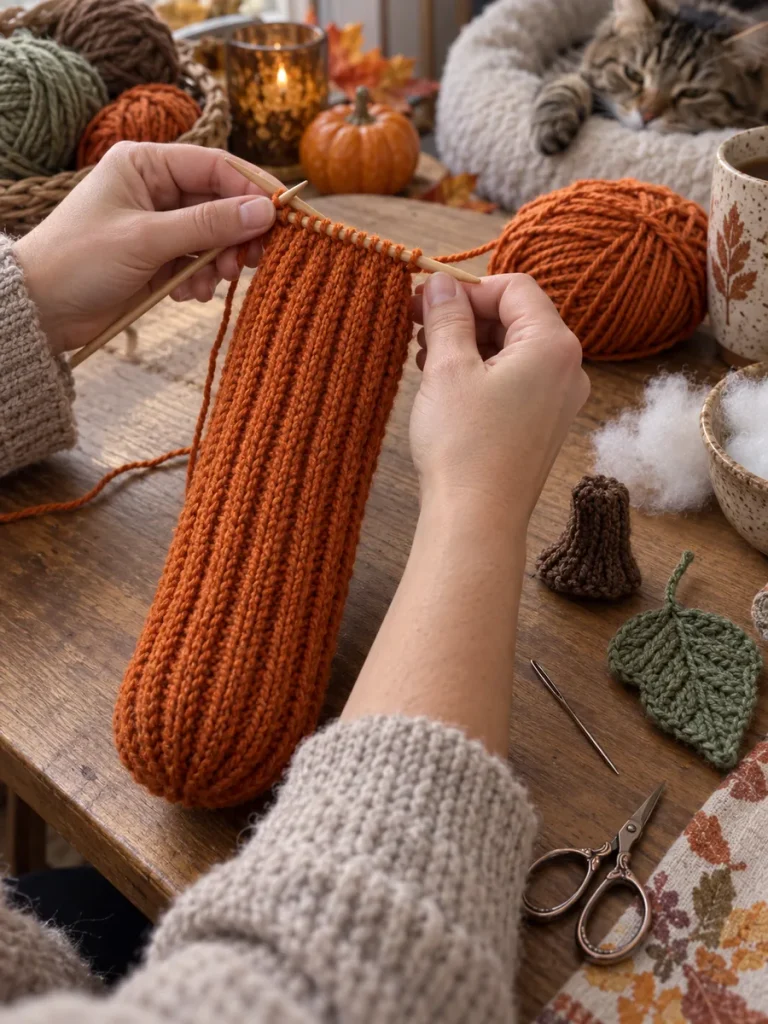
- Knit a long ribbed orange tube and stuff it firmly.
- Shape subtle pumpkin sections by drawing strong yarn through the body if needed.
- Add a short brown stem and one securely attached sage-green leaf.
- The final toy should remain elongated rather than becoming a small decorative pumpkin.
Play and safety tip: Before giving a kicker toy to your cat, squeeze and bend it in several places. The stuffing should stay evenly distributed and all decorative pieces should remain firmly attached.
21. Christmas Pudding Ball Cat Toy
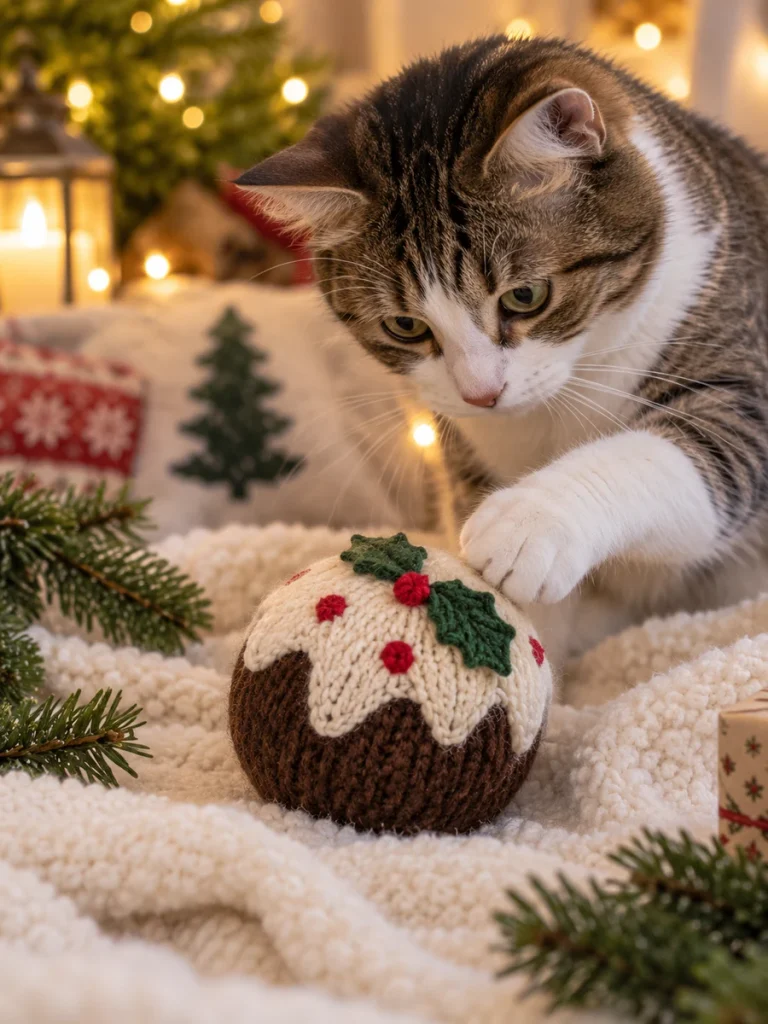
The Christmas pudding ball is a festive seasonal toss toy with a chocolate-brown base and cream icing top. Flat berry embroidery and a securely stitched leaf motif keep the holiday decoration soft and cat-friendly.
Things You Will Need
- Chocolate-brown yarn
- Cream yarn
- Red embroidery yarn
- Green yarn
- Stuffing
- Knitting needles
- Tapestry needle
How to Make It
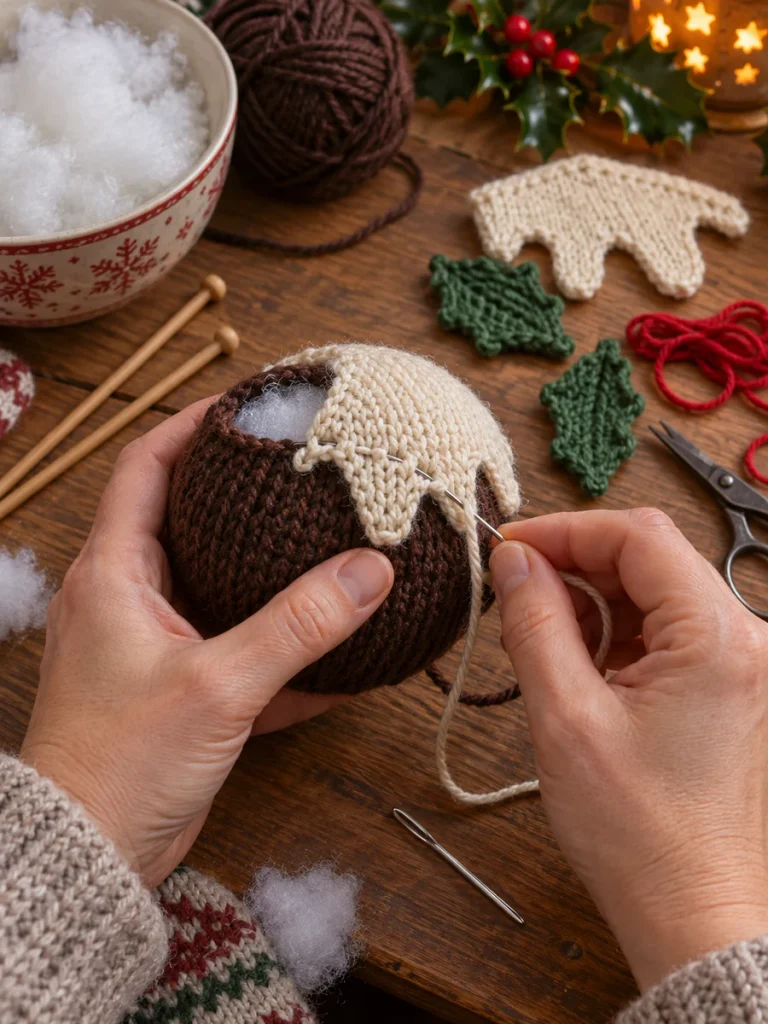
- Knit a firm brown sphere and add stuffing before closing most of the seam.
- Knit a cream icing-shaped panel and sew it flat over the top.
- Embroider small red berry details rather than adding beads or loose pom-poms.
- Add one or two flat green leaf shapes with strong, close stitching and finish the opening securely.
Play and safety tip: After finishing, roll or toss the toy gently yourself and inspect the seams again. Small handmade toys get a surprising amount of wear when a cat becomes attached to them.
22. Rainbow Arch Cat Toy
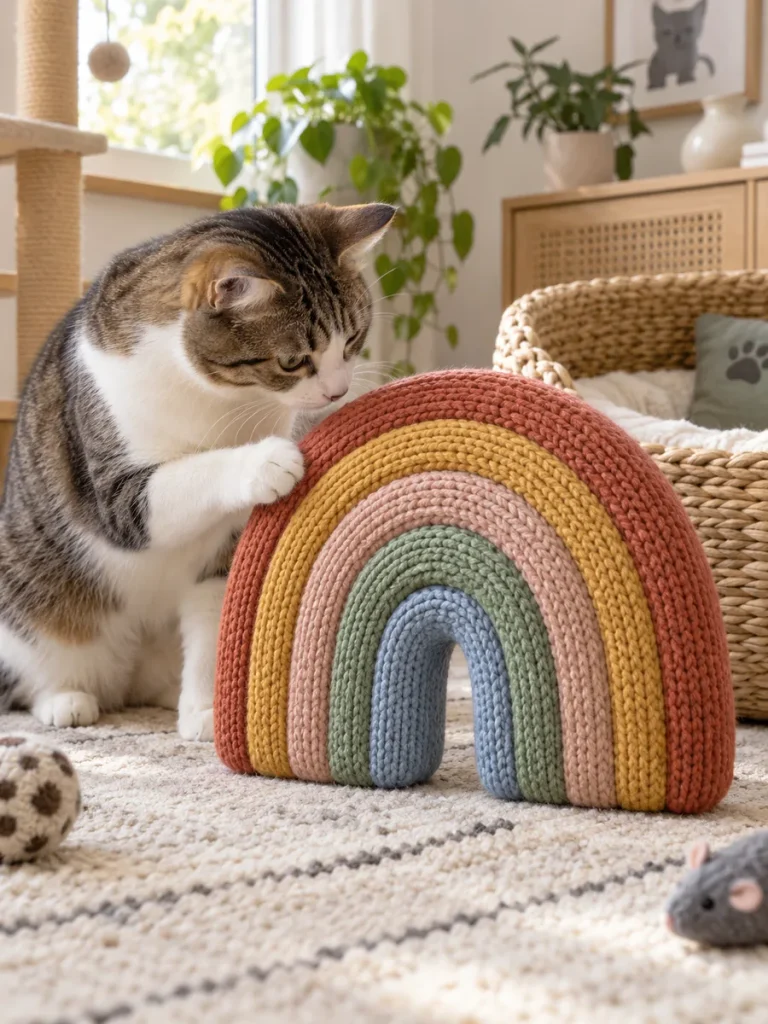
The rainbow arch is a larger statement toy that looks especially good in a modern pet room. Thick padded color bands create a solid structure with no hanging strands, making the shape cleaner and easier to inspect.
Things You Will Need
- Terracotta
- Mustard
- Dusty blush
- Sage and powder-blue yarn
- Stuffing
- Knitting needles
- Tapestry needle
How to Make It
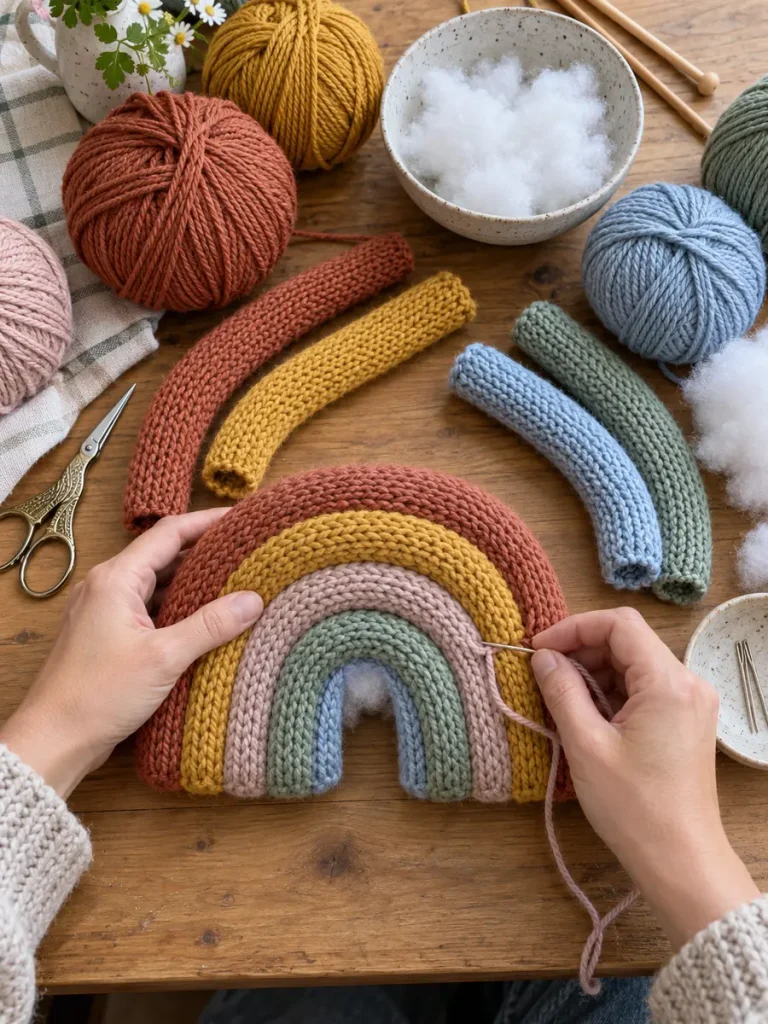
- Knit thick curved tubes or padded bands in each color.
- Stuff them evenly, then nest the bands together from smallest to largest.
- Sew along the adjoining edges so the finished rainbow behaves as one solid piece.
- Check the inner arch and lower ends carefully because these areas receive the most stress when a cat paws at the toy.
Play and safety tip: After finishing, roll or toss the toy gently yourself and inspect the seams again. Small handmade toys get a surprising amount of wear when a cat becomes attached to them.
23. Flower Garden Snuffle Ball
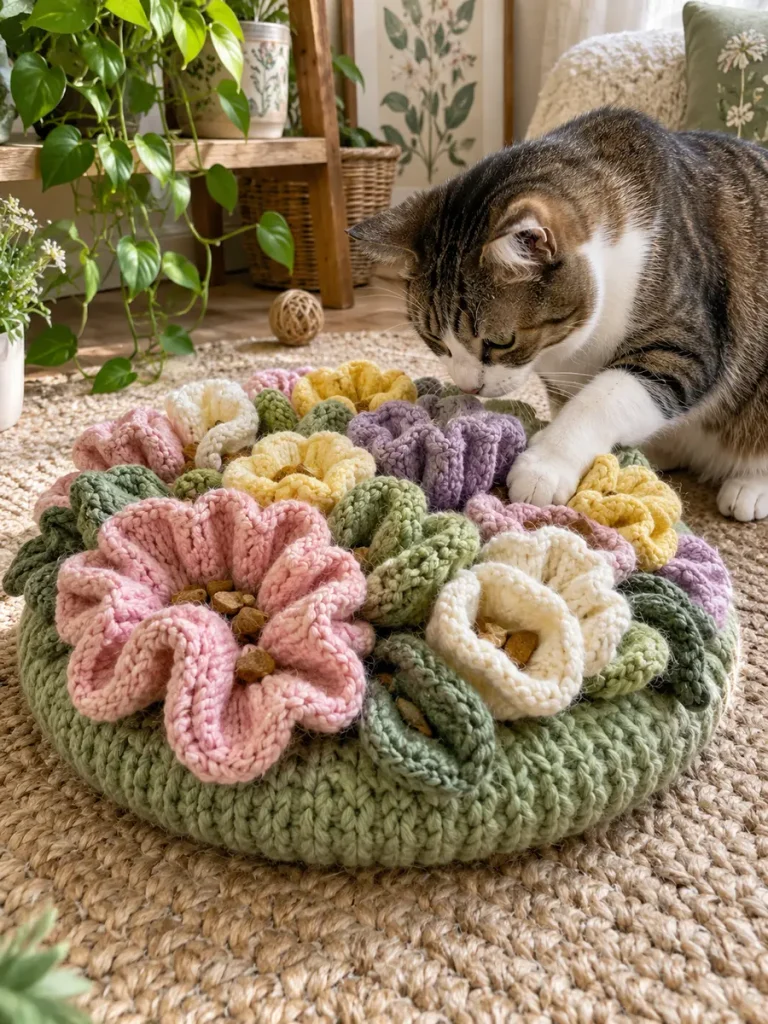
This is the most enrichment-focused project in the collection. Large flower-like folds create shallow pockets where a few pieces of dry cat food or treats can be tucked for supervised sniffing and foraging.
Things You Will Need
- Sage-green yarn
- Blush
- Lavender
- Butter-yellow and cream yarn
- Stuffing
- Knitting needles
- Tapestry needle
How to Make It
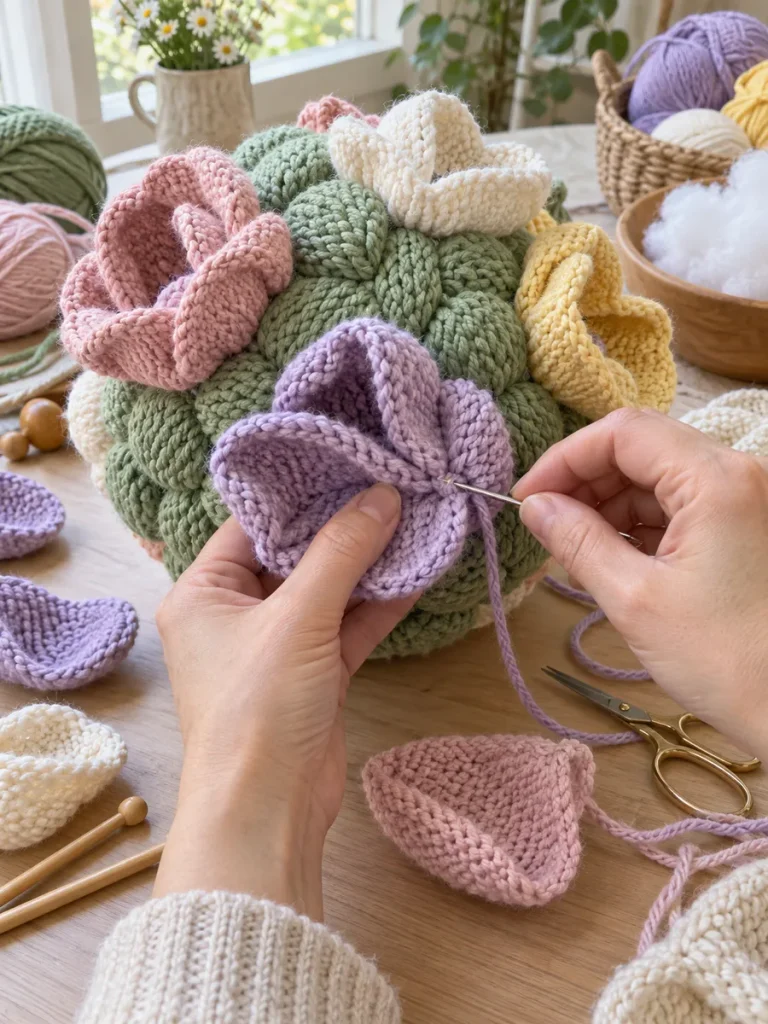
- Make a chunky padded base first.
- Knit several large flower or petal pockets in different colors and stitch them firmly onto the base, keeping each pocket broad and shallow.
- Tuck only a few dry treats between the folds and supervise play.
- Remove the toy when the session is over, especially if your cat starts chewing at the knitted pockets.
Play and safety tip: Use this as a short supervised enrichment activity rather than leaving it out all day. A few treats are enough; the goal is to encourage sniffing and pawing, not to turn the toy into a full meal bowl.
Which Knitted Cat Toy Should You Make First?
If you are new to toy making, start with a shape that does not require many separately attached pieces. The sleepy cloud, donut ring, watermelon wedge, or avocado are comfortable first projects because most of the work is in the main body. Once you are happy with your tension and seaming, move to the bee, whale, goldfish, mushroom, or octopus.
Think about your cat’s play style too. Cats that enjoy grabbing and kicking may prefer the carrot, sardine, pumpkin, or mushroom. Cats that like quick batting games may be more interested in donuts, cherries, the frog, or sushi rolls. Carrying cats often enjoy compact mouse, fish, whale, or avocado shapes. The flower garden snuffle ball is different from the rest because it is meant for a short supervised foraging session.
How to Wash Handmade Knitted Cat Toys
Always check the care instructions for the yarn you used. When in doubt, gentle hand washing is a safe approach for many stuffed handmade toys. Use a small amount of mild detergent, rinse thoroughly, press out excess water without aggressively twisting the toy, and allow it to dry completely before returning it to your cat.
Washing is also a useful inspection point. Look for stretched stitches, weakened seams, loose embroidery, or stuffing beginning to show through. A toy that cannot be repaired securely should be retired. If a toy contains catnip, repeated washing may reduce the scent, so you may eventually prefer to replace it rather than opening a finished seam.
How to Make Knitting Cat Toys Look More Polished
- Use consistent tension so the stuffing does not create lumpy thin spots.
- Stuff gradually, especially in narrow kickers and curved toys.
- Match your seaming yarn to the surrounding color when possible.
- Hide knots and yarn tails inside the toy rather than trimming them close on the surface.
- Choose a limited color palette for sets. Three or four related colors often photograph better than random scraps.
- Keep embroidered faces simple. Tiny expressions usually look cleaner than complicated facial details.
- For blog photography, pair the final toy with your cat but keep the toy itself fully visible so readers understand the shape.
Frequently Asked Questions About Knitting Cat Toys
What yarn is best for knitted cat toys?
A durable, washable, tightly spun yarn is usually easier to maintain than very fuzzy or loosely spun yarn. The exact fiber matters less than choosing something that can be knitted at a firm gauge and checked easily for damage.
Can I put catnip inside a knitted toy?
Yes, if your cat enjoys catnip. Use a small amount and enclose it well inside the stuffing. Catnip is optional, and some cats show little interest in it.
Should I use plastic safety eyes?
For cat toys, embroidered eyes and facial details are the simpler choice because there is no hard decorative piece to become exposed if the fabric is damaged. This is especially useful for toys that will be bitten or kicked.
Can kittens play with these toys?
They can enjoy appropriately sized soft toys, but supervision and frequent inspection are important. Remove anything with loose yarn, an opening seam, exposed stuffing, or a piece that can be pulled away.
How much yarn do I need?
Many small projects use only partial yarn balls, which is why handmade cat toys are excellent stash-busting projects. Larger kickers and the rainbow arch need more yarn and stuffing than the toss toys.
How often should I replace a knitted cat toy?
There is no fixed schedule. Condition matters more than age. Inspect toys regularly and replace or securely repair them as soon as you notice fraying, stretched stitches, loose parts, or exposed filling.
Final Thoughts
The nicest thing about making your own knitting cat toys is that you can match the project to both your cat and your craft style. A playful cat may go straight for the sardine kicker, while another may spend ten minutes carefully batting a tiny sushi roll. Meanwhile, you get to experiment with colors, shaping, embroidery, and small-scale construction without needing a large amount of yarn.
Start with one simple design, watch how your cat interacts with it, and use that information when choosing the next project. Whether you make a strawberry mouse, pastel donut set, sleepy cloud, rainbow arch, or flower garden snuffle ball, strong seams and regular safety checks matter just as much as a cute finished photo.




1 thought on “23 DIY Knitting Cat Toys That Are Fun and Easy to Make”