Creating a garden fountain is a delightful way to add a touch of serenity and elegance to your outdoor space. Not only do garden fountains enhance the aesthetic appeal, but they also provide the soothing sound of trickling water, which can create a peaceful atmosphere. In this blog, we will explore various DIY garden fountains ideas that you can easily implement to personalize and beautify your garden.
Creating a garden fountain is a delightful way to add a touch of serenity and elegance to your outdoor space. Not only do garden fountains enhance the aesthetic appeal, but they also provide the soothing sound of trickling water, which can create a peaceful atmosphere. In this blog, we will explore various DIY garden fountain ideas that you can easily implement to personalize and beautify your garden.
[This post may contain affiliate links. What does that mean to you? Well, if you click on a product and make a purchase, I may get some compensation from you at no charge. If you want to read the boring stuff my full disclosure can be found here.]
Planning Your DIY Garden Fountain
Identifying the Perfect Spot Before you start building your garden fountain, it’s crucial to find the right spot. Look for a location that is visible and accessible. Ensure the surface is level and there is enough space for your chosen fountain design. Consider the proximity to an electrical outlet if you are using a pump that requires electricity.
Choosing the Right Type of Fountain There are several types of garden fountains to choose from:
- Freestanding Fountains: These are versatile and can be placed anywhere in your garden.
- Wall-Mounted Fountains: Perfect for smaller spaces or to add a focal point to a garden wall.
- Pond Fountains: Ideal for larger gardens with existing ponds.
Gathering Materials and Tools Basic materials you’ll need include a water pump, tubing, and waterproof sealant. Recommended tools include a drill, level, and utility knife. Depending on your chosen fountain style, you may need additional materials such as stones, pots, or bamboo.
Simple DIY Garden Fountain Ideas
1. Terra Cotta Pot Fountain:
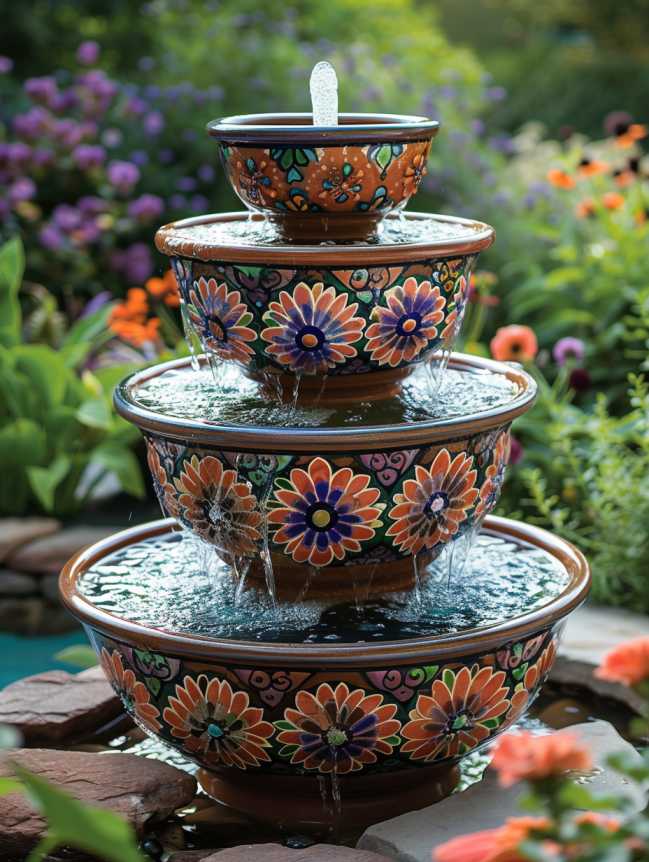
Materials Needed:
1. Terra cotta pots
2. Pump
3. Tubing
Instructions:
- Select three to four terra cotta pots of varying sizes.
- Stack the pots upside down, with the largest on the bottom.
- Drill a hole in each pot for the tubing.
- Insert the tubing and pump, securing it with waterproof sealant.
- Customize by painting the pots or adding decorative elements.
2. Stacked Stone Fountain:
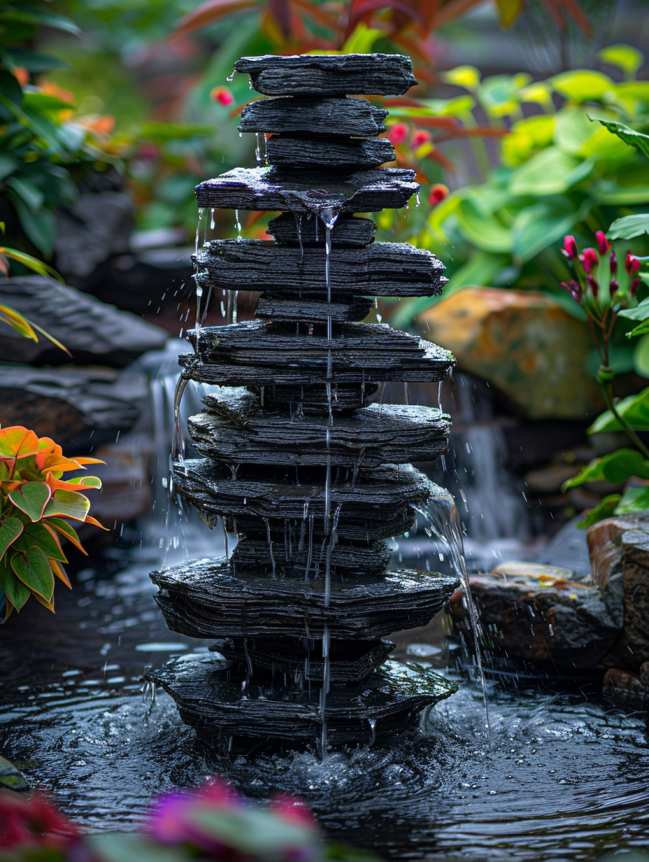
Materials Needed: Stones, Pump and tubing
Instructions:
- Gather a variety of flat stones.
- Stack the stones to create a natural-looking fountain structure.
- Drill a hole through the center of each stone for the tubing.
- Assemble the stones, threading the tubing through each.
- Connect the tubing to the pump and secure it.
3. Recycled Container Fountain:
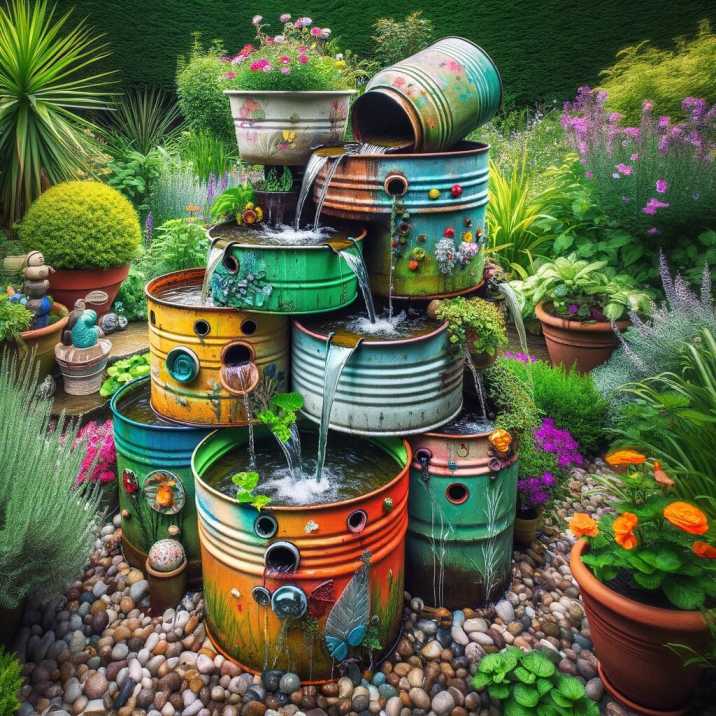
Materials Needed: Old containers, pump, tubing
Instructions:
- Choose two to three old containers, such as buckets or planters.
- Drill holes in the containers for the tubing.
- Stack and arrange the containers to create a cascading effect.
- Insert the tubing and connect it to the pump.
- Customize with paint or other decorations.
4. Bamboo Fountain:
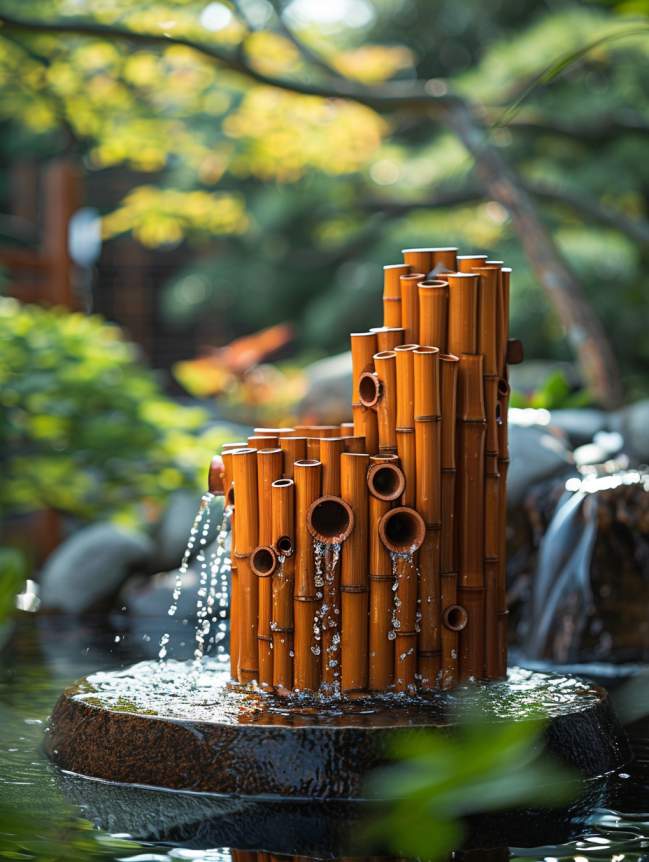
Materials Needed:
1. Bamboo poles
2. Pump, tubing
Instructions:
- Cut bamboo poles to various lengths.
- Drill holes for the tubing and water flow.
- Arrange the bamboo poles in a Zen-like design.
- Insert the tubing and connect it to the pump.
- Enhance the Zen garden atmosphere with stones and plants.
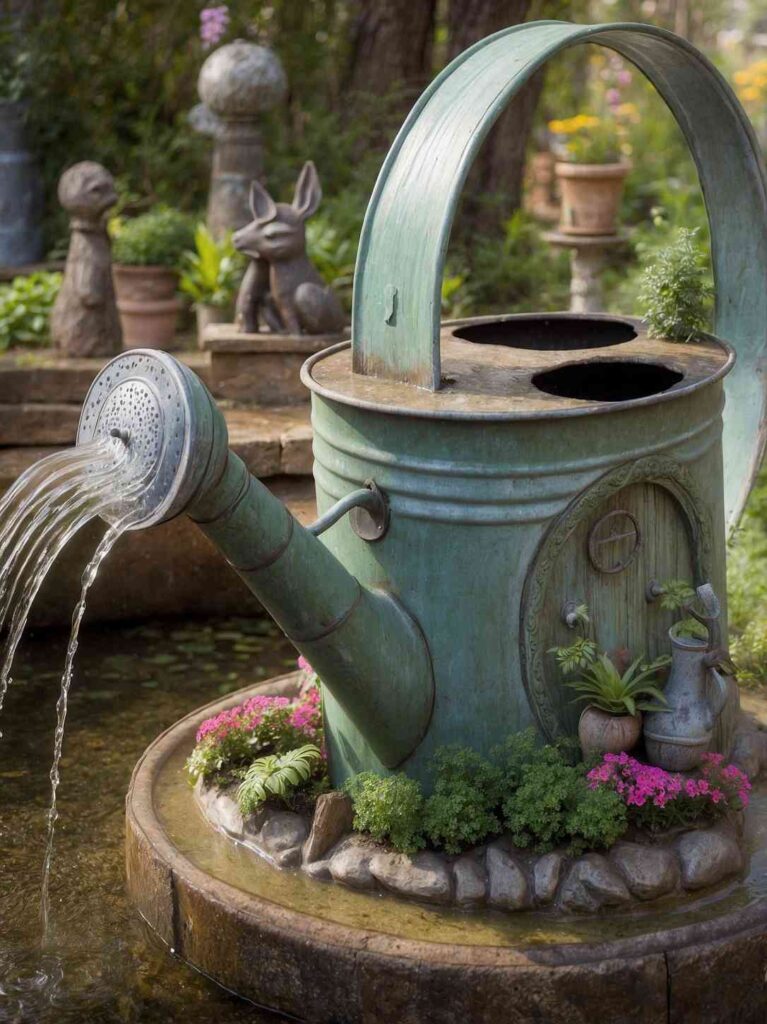
5. Watering Can Fountain:
Materials Needed:
1. Watering can
2. Pump, tubing
Instructions:
- Select a vintage or decorative watering can.
- Drill a hole for the tubing.
- Attach the tubing to the pump and secure it inside the watering can.
- Position the watering can to create a cascading water effect.
- Add whimsical touches with garden ornaments or plants.
Read More-
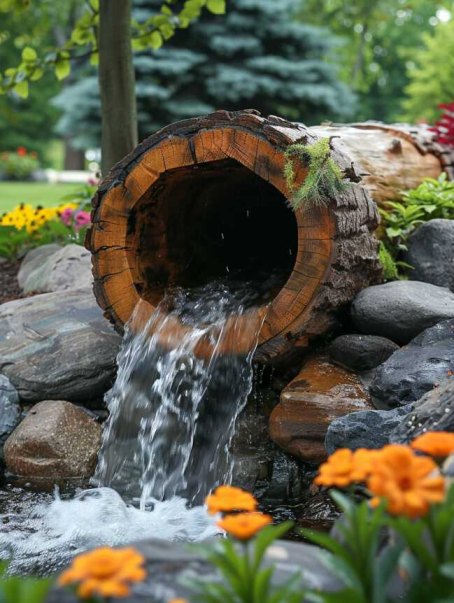
6. Log Fountain:
Materials Needed:
1. Hollowed-out log
2. Pump, tubing
Instructions:
- Find a log and hollow it out, leaving a sturdy outer shell.
- Drill a hole for the tubing.
- Insert the tubing and secure it with waterproof sealant.
- Connect the tubing to the pump.
- Position the log in a way that allows water to cascade down naturally.
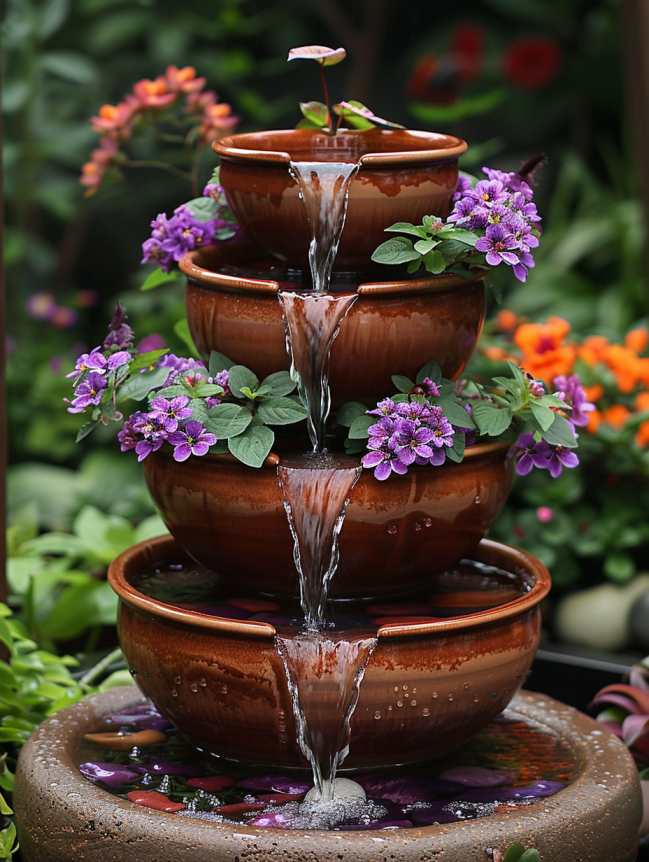
7. Ceramic Bowl Fountain
Materials Needed:
1. Ceramic bowls
2. Pump, tubing
Instructions:
- Choose two or three ceramic bowls of different sizes.
- Drill holes in the bowls for the tubing.
- Stack the bowls in a tiered arrangement.
- Insert the tubing and connect it to the pump.
- Secure the bowls and customize with decorative stones or plants.
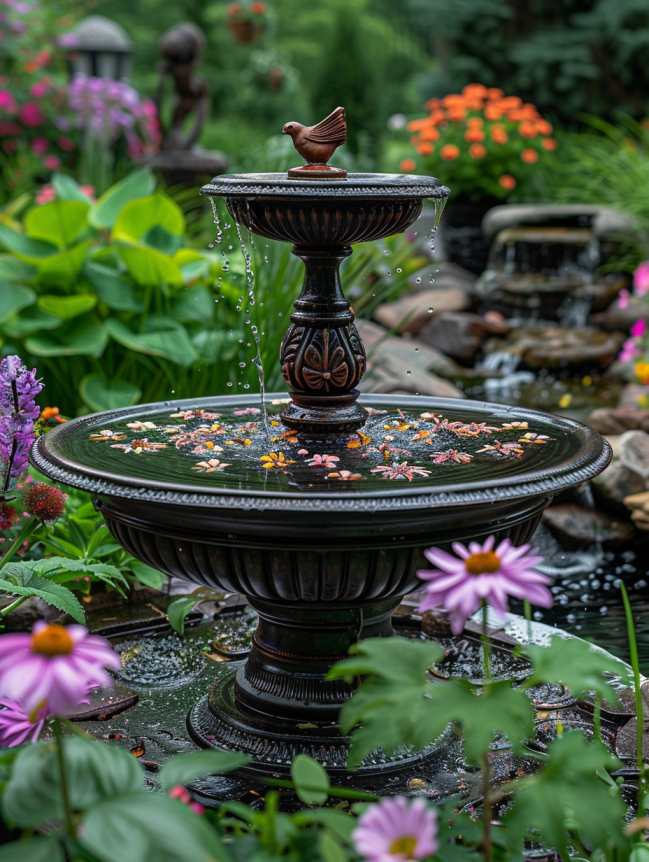
8. Bird Bath Fountain:
Materials Needed:
1. Bird bath
2. Pump, tubing
- Select a bird bath with a deep basin.
- Drill a hole for the tubing if necessary.
- Insert the tubing and connect it to the pump.
- Fill the bird bath with water and secure the pump.
- Add floating flowers or decorative elements to enhance the look.
Installing and Maintaining Your DIY Fountain
Installing the Pump and Tubing Ensure proper water flow by securely installing the pump and tubing. Conceal the pump and tubing with decorative elements to maintain the aesthetic appeal.
Adding Finishing Touches Landscaping around the fountain with plants and stones enhances its natural beauty. Consider adding underwater or surrounding lights to create a magical ambiance at night.
Maintenance Tips Regularly clean the fountain and treat the water to prevent algae growth. During colder months, winterize your fountain to protect it from damage.
Budget-Friendly Tips and Tricks
Using Recycled and Repurposed Materials Look for inexpensive or free materials by repurposing household items. Old containers, stones, and bamboo can be transformed into beautiful fountains with a bit of creativity.
Cost-Saving Tips for Pump and Equipment Affordable pumps are available online or at garden centers. DIY alternatives, such as solar-powered options, can reduce long-term costs.
Conclusion
Creating a DIY garden fountain is a rewarding project that adds beauty and tranquility to your garden. Whether you choose a simple terra cotta pot fountain or a unique bamboo fountain, the key is to personalize your creation to suit your style and space. Enjoy the process and take pride in your serene garden oasis.
